Accelerate Stable Diffusion inference with DeepSpeed-Inference on GPUs
In this session, you will learn how to optimize Stable Diffusion for Inerence using Hugging Face 🧨 Diffusers library. and DeepSpeed-Inference. The session will show you how to apply state-of-the-art optimization techniques using DeepSpeed-Inference. This session will focus on single GPU (Ampere Generation) inference for Stable-Diffusion models. By the end of this session, you will know how to optimize your Hugging Face Stable-Diffusion models using DeepSpeed-Inference. We are going to optimize CompVis/stable-diffusion-v1-4 for text-to-image generation.
You will learn how to:
- Setup Development Environment
- Load vanilla Stable Diffusion model and set baseline
- Optimize Stable Diffusion for GPU using DeepSpeeds
InferenceEngine - Evaluate the performance and speed
Let's get started! 🚀
This tutorial was created and run on a g5.xlarge AWS EC2 Instance including an NVIDIA A10G. The tutorial doesn't work on older GPUs, e.g. due to incompatibility of triton kernels.
Quick Intro: What is DeepSpeed-Inference
DeepSpeed-Inference is an extension of the DeepSpeed framework focused on inference workloads. DeepSpeed Inference combines model parallelism technology such as tensor, pipeline-parallelism, with custom optimized cuda kernels. DeepSpeed provides a seamless inference mode for compatible transformer based models trained using DeepSpeed, Megatron, and HuggingFace. For a list of compatible models please see here. As mentioned DeepSpeed-Inference integrates model-parallelism techniques allowing you to run multi-GPU inference for LLM, like BLOOM with 176 billion parameters. If you want to learn more about DeepSpeed inference:
- Paper: DeepSpeed Inference: Enabling Efficient Inference of Transformer Models at Unprecedented Scale
- Blog: Accelerating large-scale model inference and training via system optimizations and compression
1. Setup Development Environment
Our first step is to install Deepspeed, along with PyTorch, Transfromers, Diffusers and some other libraries. Running the following cell will install all the required packages.
Note: You need a machine with a GPU and a compatible CUDA installed. You can check this by running nvidia-smi in your terminal. If your setup is correct, you should get statistics about your GPU.
!pip install torch==1.12.1 --extra-index-url https://download.pytorch.org/whl/cu116 --upgrade
!pip install deepspeed==0.7.4 --upgrade
!pip install diffusers==0.6.0 triton==2.0.0.dev20221005 --upgrade
!pip install transformers[sentencepiece]==4.24.0 accelerate --upgrade
Before we start. Let's make sure all packages are installed correctly.
import re
import torch

# check deepspeed installation
report = !python3 -m deepspeed.env_report
r = re.compile('.*ninja.*OKAY.*')
assert any(r.match(line) for line in report) == True, "DeepSpeed Inference not correct installed"

# check cuda and torch version
torch_version, cuda_version = torch.__version__.split("+")
torch_version = ".".join(torch_version.split(".")[:2])
cuda_version = f"{cuda_version[2:4]}.{cuda_version[4:]}"
r = re.compile(f'.*torch.*{torch_version}.*')
assert any(r.match(line) for line in report) == True, "Wrong Torch version"
r = re.compile(f'.*cuda.*{cuda_version}.*')
assert any(r.match(line) for line in report) == True, "Wrong Cuda version"
2. Load vanilla Stable Diffusion model and set baseline
After we set up our environment, we create a baseline for our model. We use the CompVis/stable-diffusion-v1-4 checkpoint.
Before we can load our model from the Hugging Face Hub we have to make sure that we accepted the license of CompVis/stable-diffusion-v1-4 to be able to use it. CompVis/stable-diffusion-v1-4 is published under the CreativeML OpenRAIL-M license. You can accept the license by clicking on the Agree and access repository button on the model page at: https://huggingface.co/CompVis/stable-diffusion-v1-4.
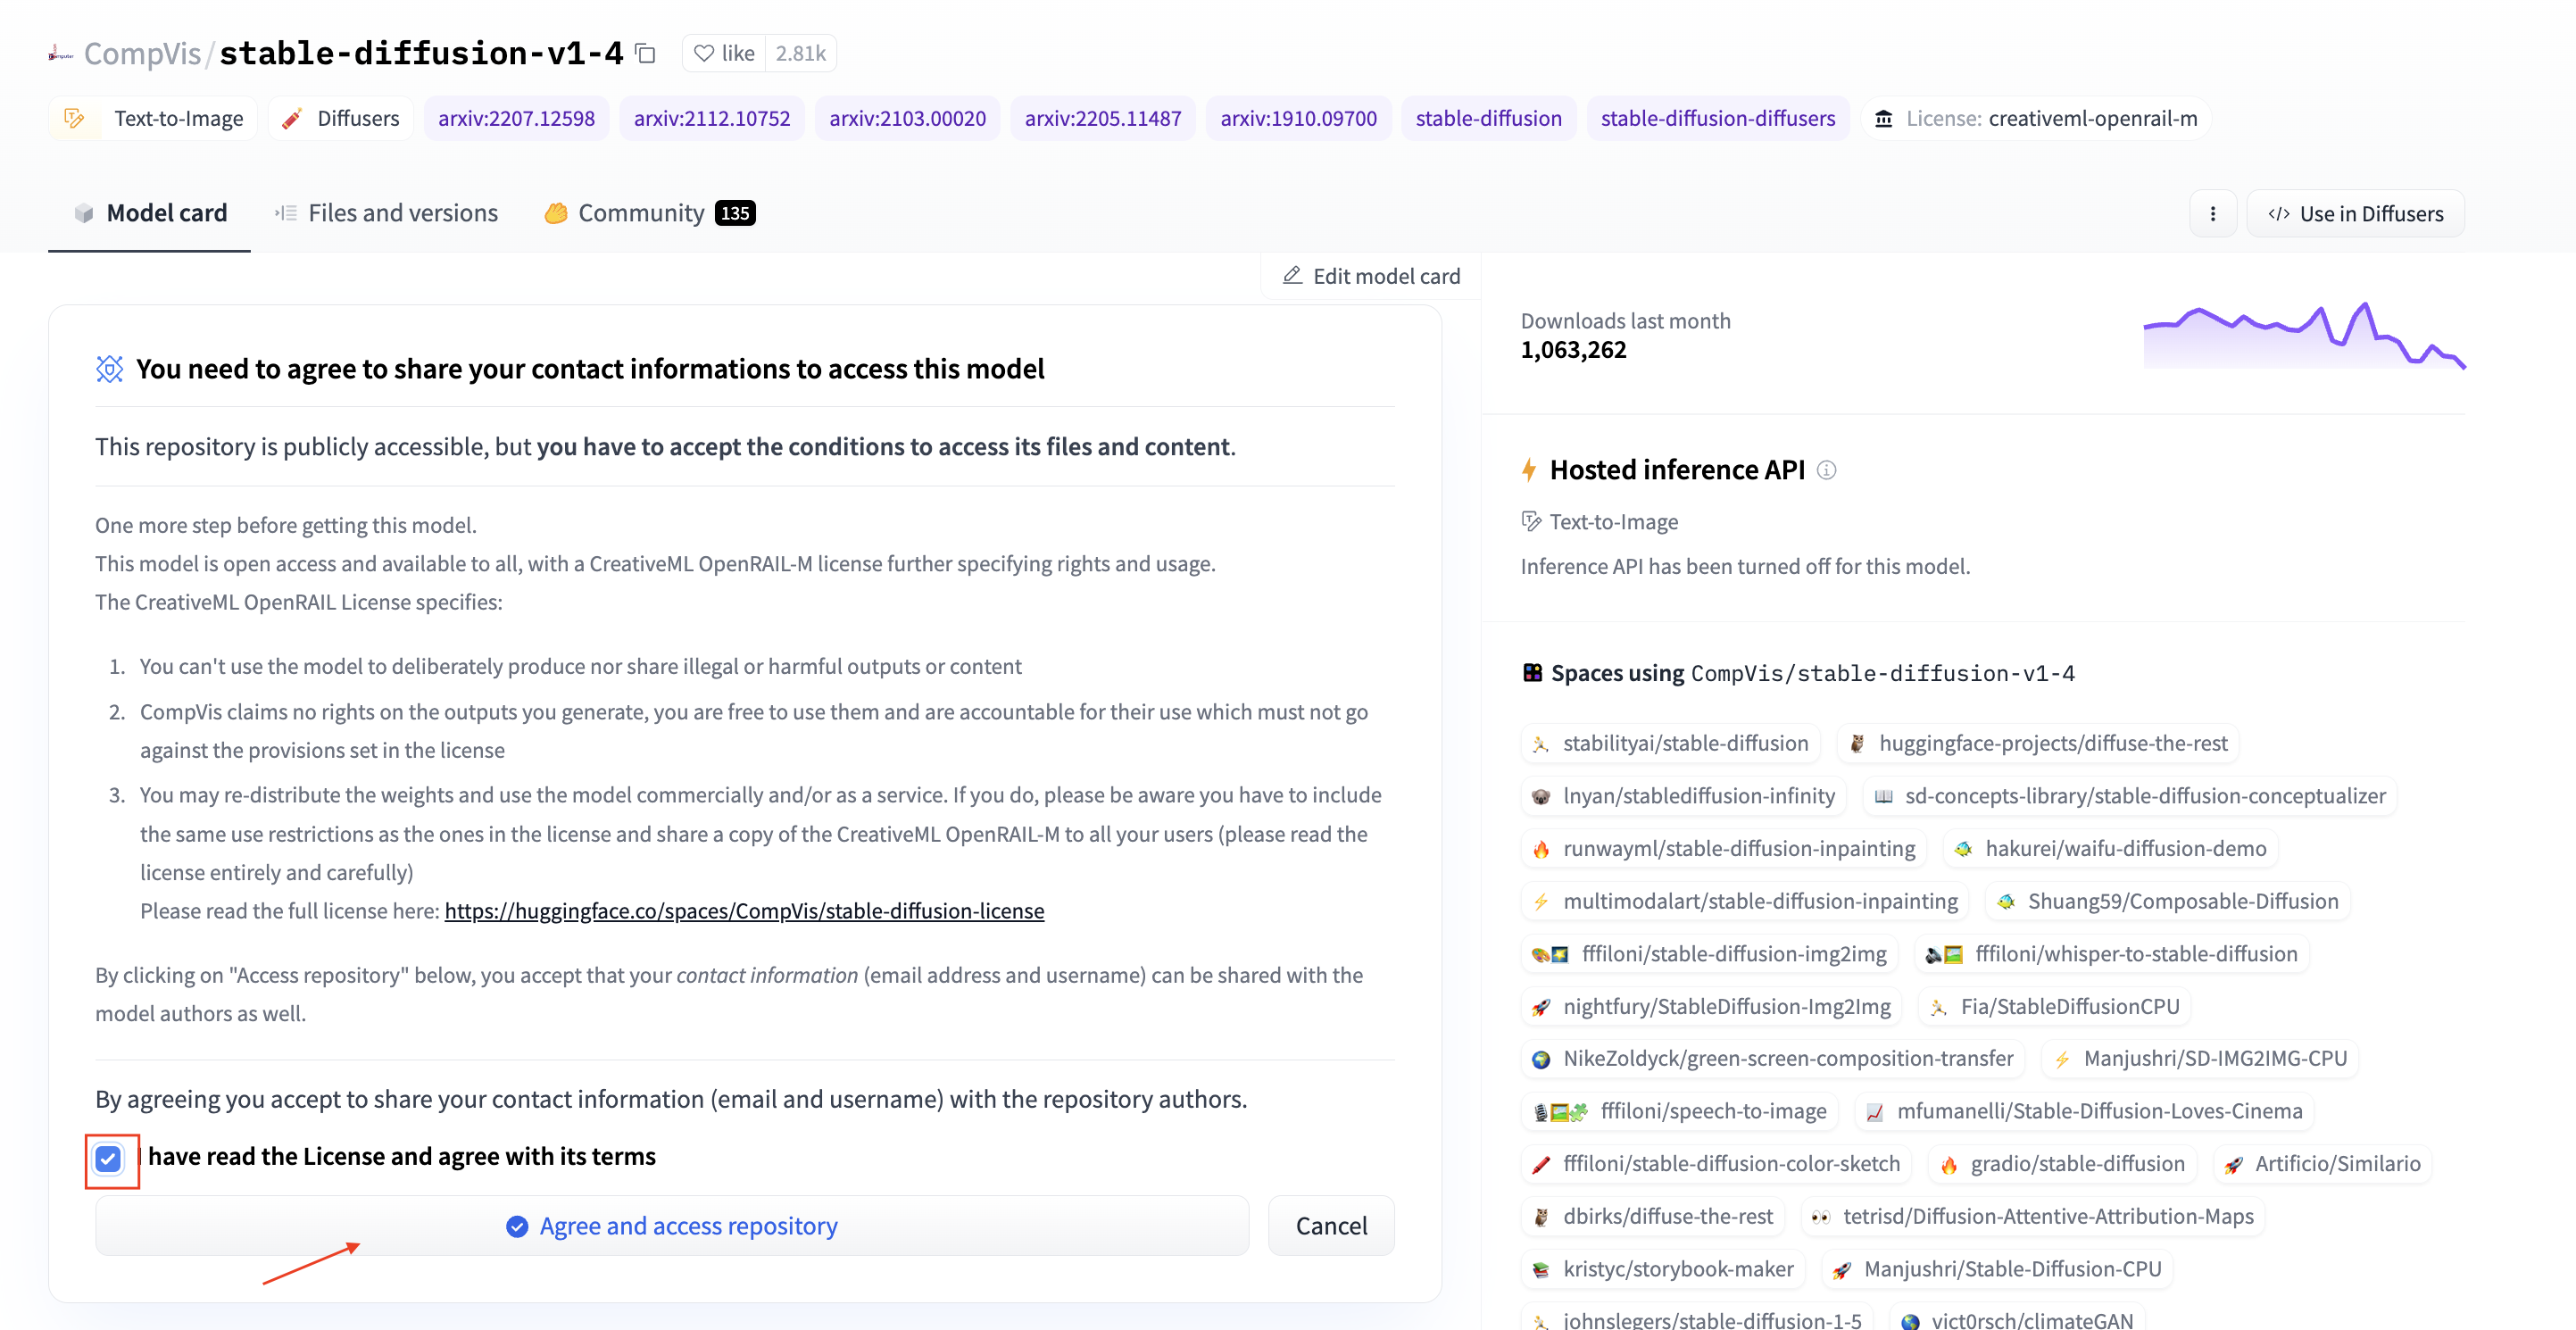
Note: This will give access to the repository for the logged in user. This user can then be used to generate HF Tokens to load the model programmatically.
Before we can load the model make sure you have a valid HF Token. You can create a token by going to your Hugging Face Settings and clicking on the New token button. Make sure the enviornment has enough diskspace to store the model, ~30GB should be enough.
from diffusers import DiffusionPipeline
import torch

HF_MODEL_ID="CompVis/stable-diffusion-v1-4"
HF_TOKEN="" # your hf token: https://huggingface.co/settings/tokens
assert len(HF_TOKEN) > 0, "Please set HF_TOKEN to your huggingface token. You can find it here: https://huggingface.co/settings/tokens"

# load vanilla pipeline
pipeline = DiffusionPipeline.from_pretrained(HF_MODEL_ID, torch_dtype=torch.float16, revision="fp16",use_auth_token=HF_TOKEN)

# move pipeline to GPU
device = "cuda"
pipeline = pipeline.to(device)
We can now test our pipeline and generate an image
pipeline("a photo of an astronaut riding a horse on mars").images[0]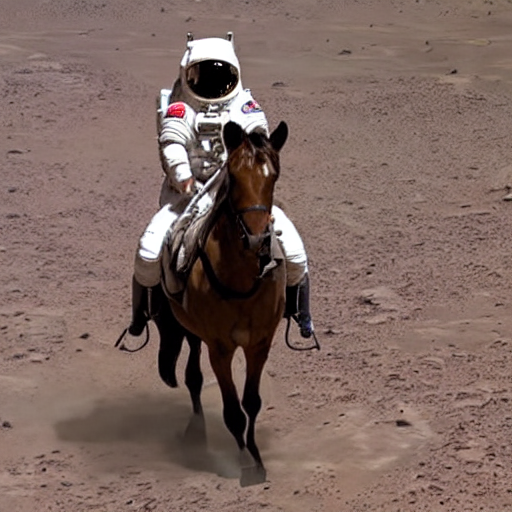
The next step is to create a latency baseline we use the measure_latency function, which implements a simple python loop to run inference and calculate the avg, mean & p95 latency for our model.
from time import perf_counter
import numpy as np


def measure_latency(pipe, prompt):
    latencies = []
    # warm up
    pipe.set_progress_bar_config(disable=True)
    for _ in range(2):
        _ =  pipe(prompt)
    # Timed run
    for _ in range(10):
        start_time = perf_counter()
        _ = pipe(prompt)
        latency = perf_counter() - start_time
        latencies.append(latency)
    # Compute run statistics
    time_avg_s = np.mean(latencies)
    time_std_s = np.std(latencies)
    time_p95_s = np.percentile(latencies,95)
    return f"P95 latency (seconds) - {time_p95_s:.2f}; Average latency (seconds) - {time_avg_s:.2f} +\- {time_std_s:.2f};", time_p95_s
We are going to use the same prompt as we used in our example.
prompt = "a photo of an astronaut riding a horse on mars"

vanilla_results = measure_latency(pipeline,prompt)

print(f"Vanilla pipeline: {vanilla_results[0]}")
#     Vanilla pipeline: P95 latency (seconds) - 4.57; Average latency (seconds) - 4.56 +\- 0.00;
Our pipelines achieves latency of 4.57s on a single GPU. This is a good baseline for our optimization.
3. Optimize Stable Diffusion for GPU using DeepSpeeds InferenceEngine
The next and most important step is to optimize our pipeline for GPU inference. This will be done using the DeepSpeed InferenceEngine. The InferenceEngine is initialized using the init_inference method. We are going to replace the models including the UNET and CLIP model in our pipeline with DeepSpeed optimized models.
The init_inference method expects as parameters atleast:
model: The model to optimize, in our case the whole pipeline.mp_size: The number of GPUs to use.dtype: The data type to use.replace_with_kernel_inject: Whether inject custom kernels.
You can find more information about the init_inference method in the DeepSpeed documentation or thier inference blog.
Note: You might need to restart your kernel if you are running into a CUDA OOM error.
import torch
import deepspeed
from diffusers import DiffusionPipeline


# Model Repository on huggingface.co
HF_MODEL_ID="CompVis/stable-diffusion-v1-4"
HF_TOKEN="" # your hf token: https://huggingface.co/settings/tokens
assert len(HF_TOKEN) > 0, "Please set HF_TOKEN to your huggingface token. You can find it here: https://huggingface.co/settings/tokens"

# load vanilla pipeline
ds_pipeline = DiffusionPipeline.from_pretrained(HF_MODEL_ID, torch_dtype=torch.float16, revision="fp16",use_auth_token=HF_TOKEN)

# init deepspeed inference engine
deepspeed.init_inference(
    model=getattr(ds_pipeline,"model", ds_pipeline),      # Transformers models
    mp_size=1,        # Number of GPU
    dtype=torch.float16, # dtype of the weights (fp16)
    replace_method="auto", # Lets DS autmatically identify the layer to replace
    replace_with_kernel_inject=False, # replace the model with the kernel injector
)
print("DeepSpeed Inference Engine initialized")
We can now inspect a model graph to see that the vanilla UNet2DConditionModel has been replaced with an DSUNet, which includes the DeepSpeedAttention and triton_flash_attn_kernel module, custom nn.Module that is optimized for inference.
DSUNet(
  (unet): UNet2DConditionModel(
    (conv_in): Conv2d(4, 320, kernel_size=(3, 3), stride=(1, 1), padding=(1, 1))
    (time_proj): Timesteps()
    (time_embedding): TimestepEmbedding(
      (linear_1): Linear(in_features=320, out_features=1280, bias=True)
      (act): SiLU()
      (linear_2): Linear(in_features=1280, out_features=1280, bias=True)
    )
    (down_blocks): ModuleList(
      (0): CrossAttnDownBlock2D(
        (attentions): ModuleList(
          (0): SpatialTransformer(
            (norm): GroupNorm(32, 320, eps=1e-06, affine=True)
            (proj_in): Conv2d(320, 320, kernel_size=(1, 1), stride=(1, 1))
            (transformer_blocks): ModuleList(
              (0): BasicTransformerBlock(
                (attn1): DeepSpeedAttention(
                  (triton_flash_attn_kernel): triton_flash_attn()
)from deepspeed.ops.transformer.inference.triton_ops import triton_flash_attn
from deepspeed.ops.transformer.inference import DeepSpeedAttention
assert isinstance(ds_pipeline.unet.unet.down_blocks[0].attentions[0].transformer_blocks[0].attn1, DeepSpeedAttention) == True, "Model not sucessfully initalized"
assert isinstance(ds_pipeline.unet.unet.down_blocks[0].attentions[0].transformer_blocks[0].attn1.triton_flash_attn_kernel, triton_flash_attn) == True, "Model not sucessfully initalized"4. Evaluate the performance and speed
As the last step, we want to take a detailed look at the performance of our optimized pipelines. Applying optimization techniques, like graph optimizations or mixed-precision, not only impact performance (latency) those also might have an impact on the accuracy of the model. So accelerating your model comes with a trade-off.
Let's test the performance (latency) of our optimized pipeline. We will use the same prompt as for our vanilla model.
prompt = "a photo of an astronaut riding a horse on mars"
ds_results = measure_latency(ds_pipeline,prompt)
print(f"DeepSpeed model: {ds_results[0]}")
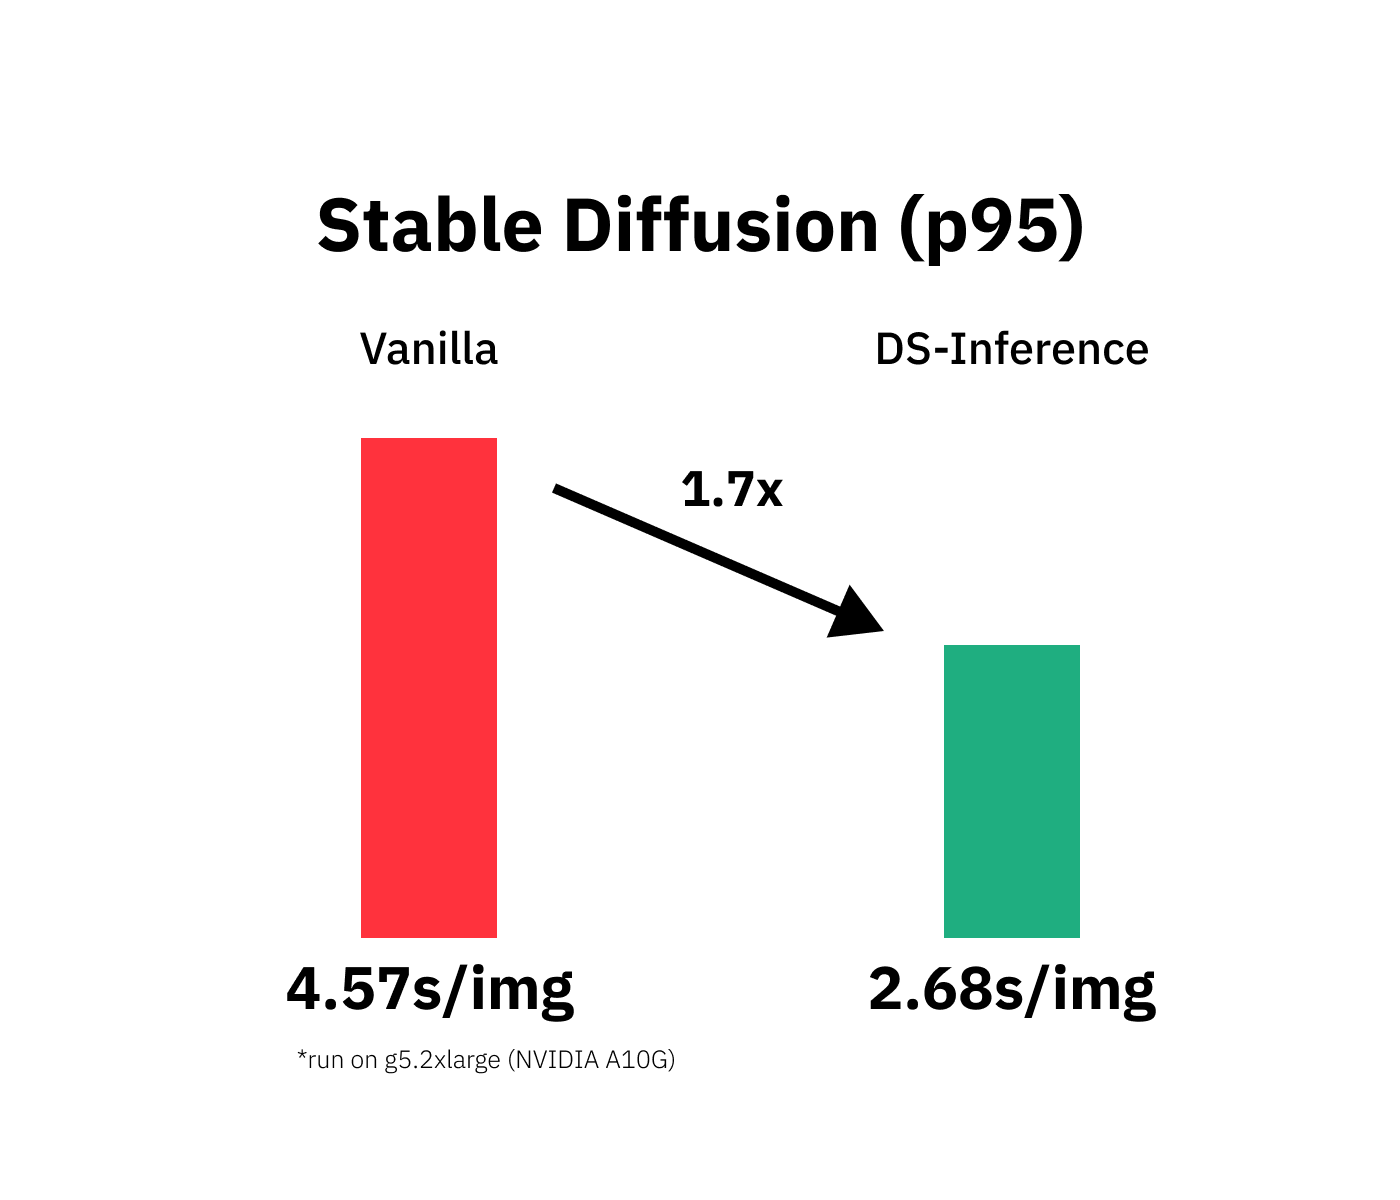
# DeepSpeed model: P95 latency (seconds) - 2.68; Average latency (seconds) - 2.67 +\- 0.00;Our Optimized DeepSpeed pipeline achieves latency of 2.68s. This is a 1.7x improvement over our baseline. Let's take a look at the performance of our optimized pipeline.
ds_pipeline("a photo of an astronaut riding a horse on mars").images[0]
We managed to accelerate the CompVis/stable-diffusion-v1-4 pipeline latency from 4.57s to 2.68s for generating a 512x512 large image. This results into a 1.7x improvement.
Conclusion
We successfully optimized our Stable Diffusion with DeepSpeed-inference and managed to decrease our model latency from 4.57s to 2.68s or 1.7x.
Those are good results results thinking of that we only needed to add 1 additional line of code, but applying the optimization was as easy as adding one additional call to deepspeed.init_inference.
But I have to say that this isn't a plug-and-play process you can transfer to any Transformers model, task, or dataset. Also, make sure to check if your model is compatible with DeepSpeed-Inference.
If you want to learn more about Stable Diffusion you should check out:
- Stable Diffusion with 🧨 Diffusers
- Stable Diffusion on Amazon SageMaker
- Stable Diffusion Image Generation under 1 second w. DeepSpeed MII
Thanks for reading! If you have any questions, feel free to contact me on Twitter or LinkedIn.