Getting started with Transformers and TPU using PyTorch
Tensor Processing Units (TPU) are specialized accelerators developed by Google to speed up machine learning tasks. They are built from the ground up with a focus on machine & deep learning workloads.
TPUs are available on the Google Cloud and can be used with popular deep learning frameworks, including TensorFlow, JAX, and PyTorch.
This blog post will cover how to get started with Hugging Face Transformers and TPUs using PyTorch and accelerate. You will learn how to fine-tune a BERT model for Text Classification using the newest Google Cloud TPUs.
You will learn how to:
- Launch TPU VM on Google Cloud
- Setup Jupyter environment & install Transformers
- Load and prepare the dataset
- Fine-tune BERT on the TPU with the Hugging Face
accelerate
Before we can start, make sure you have a Hugging Face Account to save artifacts and experiments.
1. Launch TPU VM on Google Cloud
The first step is to create a TPU development environment. We are going to use the Google Cloud CLI gcloud to create a cloud TPU VM using PyTorch 1.13 image.
If you don´t have the cloud installed check out the documentation or run the command below.
curl https://sdk.cloud.google.com | bash
exec zsh -l
gcloud init
We can now create our cloud TPU VM with our preferred region, project and version.
Note: Make sure to have the Cloud TPU API enabled to create your Cloud TPU VM
gcloud compute tpus tpu-vm create bert-example \
--zone=europe-west4-a \
--accelerator-type=v3-8 \
--version=tpu-vm-pt-1.13
2. Setup Jupyter environment & install Transformers
Our cloud TPU VM is now running, and we can ssh into it, but who likes to develop inside a terminal? We want to set up a Jupyter environment, which we can access through our local browser. For this, we need to add a port for forwarding in the gcloud ssh command, which will tunnel our localhost traffic to the cloud TPU.
gcloud compute tpus tpu-vm ssh bert-example \
--zone europe-west4-a \
-- -L 8080:localhost:8080
Before we can access our environment, we need to install jupyter and the Hugging Face Libraries, including transformers and datasets. Running the following command will install all the required packages.
pip3 install jupyter transformers datasets evaluate accelerate tensorboard scikit-learn  --upgrade
# install specific markupsafe version to not break
pip3 markupsafe==2.0.1
We can now start our jupyter server.
python3 -m notebook --allow-root --port=8080You should see a familiar jupyter output with a URL to the notebook.
http://localhost:8080/?token=8c1739aff1755bd7958c4cfccc8d08cb5da5234f61f129a9
We can click on it, and a jupyter environment opens in our local browser.
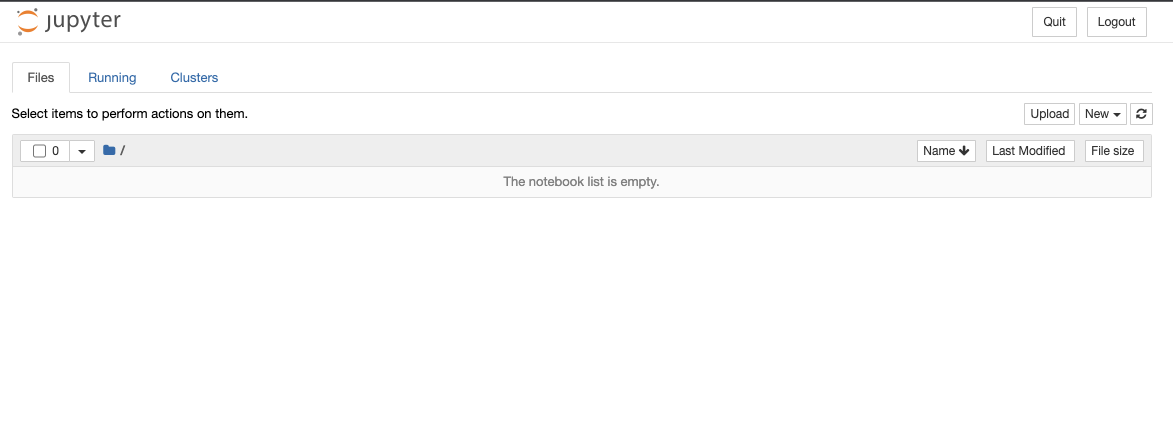
We can now create a new notebook and test to see if we have access to the TPUs.
import os

# make the TPU available accelerator to torch-xla
os.environ["XRT_TPU_CONFIG"]="localservice;0;localhost:51011"

import torch
import torch_xla.core.xla_model as xm

device = xm.xla_device()
t1 = torch.randn(3,3,device=device)
t2 = torch.randn(3,3,device=device)
print(t1 + t2)

# tensor([[-1.1846, -0.7140, -0.4168],
#        [-0.3259, -0.5264, -0.8828],
#        [-0.8562, -0.5813,  0.3264]], device='xla:1')
Awesome! 🎉 We can use our TPU with PyTorch. Let's get to our example.
NOTE: make sure to restart your notebook to not longer allocate a TPU with the tensor we created!
3. Load and prepare the dataset
We are training a Text Classification model on the BANKING77 dataset to keep the example straightforward. The BANKING77 dataset provides a fine-grained set of intents (classes) in a banking/finance domain. It comprises 13,083 customer service queries labeled with 77 intents. It focuses on fine-grained single-domain intent detection.
This is the same dataset we used for the “Getting started with Pytorch 2.0 and Hugging Face Transformers”, which will help us to compare the performance later.
We will use the load_dataset() method from the 🤗 Datasets library to load the banking77.
from datasets import load_dataset

# Dataset id from huggingface.co/dataset
dataset_id = "banking77"

# Load raw dataset
raw_dataset = load_dataset(dataset_id)

print(f"Train dataset size: {len(raw_dataset['train'])}")
print(f"Test dataset size: {len(raw_dataset['test'])}")

# Train dataset size: 10003
# Test dataset size: 3080
Let’s check out an example of the dataset.
from random import randrange

random_id = randrange(len(raw_dataset['train']))
raw_dataset['train'][random_id]
# {'text': 'How can I change my PIN without going to the bank?', 'label': 21}
To train our model, we need to convert our "Natural Language" to token IDs. This is done by a Tokenizer, which tokenizes the inputs (including converting the tokens to their corresponding IDs in the pre-trained vocabulary) if you want to learn more about this, out chapter 6 of the Hugging Face Course.
Since TPUs expect a fixed shape of inputs, we need to make sure to truncate or pad all samples to the same length.
from transformers import AutoTokenizer

# Model id to load the tokenizer
model_id = "bert-base-uncased"
# Load Tokenizer
tokenizer = AutoTokenizer.from_pretrained(model_id)

# Tokenize helper function
def tokenize(batch):
    return tokenizer(batch['text'], padding='max_length', truncation=True,return_tensors="pt")

# Tokenize dataset
raw_dataset =  raw_dataset.rename_column("label", "labels") # to match Trainer
tokenized_dataset = raw_dataset.map(tokenize, batched=True, remove_columns=["text"])
tokenized_dataset = tokenized_dataset.with_format("torch")

print(tokenized_dataset["train"].features.keys())
# dict_keys(['input_ids', 'token_type_ids', 'attention_mask','lable'])
We are using Hugging Face accelerate to train our model in this example. Accelerate is a library to easily write PyTorch training loops for agnostic Hardware setups, which makes it super easy to write TPU training methods without the need to know any XLA features.
4. Fine-tune BERT on the TPU with the Hugging Face accelerate
Accelerate is enables PyTorch users run PyTorch training across any distributed configuration by adding just four lines of code! Built on torch_xla and torch.distributed, 🤗 Accelerate takes care of the heavy lifting, so you don’t have to write any custom code to adapt to these platforms.
Accelerate implements a notebook launcher, which allows you to easily start your training jobs from a notebook cell rather than needing to use torchrun or other launcher, which makes experimenting so much easier, since we can write all the code in the notebook rather than the need to create long and complex python scripts. We are going to use the notebook_launcher which will allow us to skip the accelerate config command, since we define our environment inside the notebook.
The two most important things to remember for training on TPUs is that the accelerator object has to be defined inside the training_function, and your model should be created outside the training function.
We will load our model with the AutoModelForSequenceClassification class from the Hugging Face Hub. This will initialize the pre-trained BERT weights with a classification head on top. Here we pass the number of classes (77) from our dataset and the label names to have readable outputs for inference.
from transformers import AutoModelForSequenceClassification

# Model id to load the tokenizer
model_id = "bert-base-uncased"

# Prepare model labels - useful for inference
labels = tokenized_dataset["train"].features["labels"].names
num_labels = len(labels)
label2id, id2label = dict(), dict()
for i, label in enumerate(labels):
    label2id[label] = str(i)
    id2label[str(i)] = label

# Download the model from huggingface.co/models
model = AutoModelForSequenceClassification.from_pretrained(
    model_id, num_labels=num_labels, label2id=label2id, id2label=id2label
)
We evaluate our model during training. We use the evaluate library to calculate the f1 metric during training on our test split.
import evaluate
import numpy as np

# Metric Id
metric = evaluate.load("f1")
We can now write our train_function. If you want to learn more about how to adjust a basic PyTorch training loop to accelerate you can take a look at the Migrating your code to 🤗 Accelerate guide.
We are using a magic cell %%writefile to write the train_function to an external train.py module to properly use it in ipython. The train.py module also includes a create_dataloaders method, which will be used to create our DataLoaders for training using the tokenized dataset.
%%writefile train.py

from datasets import load_dataset, load_metric
from accelerate import Accelerator
from transformers import (
    AdamW,
    get_linear_schedule_with_warmup
)
from tqdm.auto import tqdm
import datasets
import transformers
import torch
from torch.utils.data import DataLoader

def create_dataloaders(tokenized_dataset, train_batch_size=8, eval_batch_size=32):
    train_dataloader = DataLoader(
        tokenized_dataset["train"], shuffle=True, batch_size=train_batch_size
    )
    eval_dataloader = DataLoader(
        tokenized_dataset["test"], shuffle=False, batch_size=eval_batch_size
    )
    return train_dataloader, eval_dataloader

def training_function(model,hyperparameters,metric,tokenized_dataset):
    # Initialize accelerator with bf16
    accelerator = Accelerator()# mixed_precision="bf16")

    # To have only one message (and not 8) per logs of Transformers or Datasets, we set the logging verbosity
    if accelerator.is_main_process:
        datasets.utils.logging.set_verbosity_warning()
        transformers.utils.logging.set_verbosity_info()
    else:
        datasets.utils.logging.set_verbosity_error()
        transformers.utils.logging.set_verbosity_error()

    train_dataloader, eval_dataloader = create_dataloaders(
        tokenized_dataset,train_batch_size=hyperparameters["per_tpu_train_batch_size"], eval_batch_size=hyperparameters["per_tpu_eval_batch_size"]
    )

    # Instantiate optimizer
    optimizer = AdamW(params=model.parameters(), lr=hyperparameters["learning_rate"])

    # Prepare everything
    model, optimizer, train_dataloader, eval_dataloader = accelerator.prepare(
        model, optimizer, train_dataloader, eval_dataloader
    )

    num_epochs = hyperparameters["num_epochs"]
    # Instantiate learning rate scheduler
    lr_scheduler = get_linear_schedule_with_warmup(
        optimizer=optimizer,
        num_warmup_steps=100,
        num_training_steps=len(train_dataloader) * num_epochs,
    )

    # Add a progress bar to keep track of training.
    progress_bar = tqdm(range(num_epochs * len(train_dataloader)), disable=not accelerator.is_main_process)
    # Now we train the model
    for epoch in range(num_epochs):
        model.train()
        for step, batch in enumerate(train_dataloader):
            outputs = model(**batch)
            loss = outputs.loss
            accelerator.backward(loss)

            optimizer.step()
            lr_scheduler.step()
            optimizer.zero_grad()

            progress_bar.update(1)


        # run evaluation after the training epoch
        model.eval()
        all_predictions = []
        all_labels = []

        for step, batch in enumerate(eval_dataloader):
            with torch.no_grad():
                outputs = model(**batch)
            predictions = outputs.logits.argmax(dim=-1)

            # We gather predictions and labels from the 8 TPUs to have them all.
            all_predictions.append(accelerator.gather(predictions))
            all_labels.append(accelerator.gather(batch["labels"]))

        # Concatenate all predictions and labels.
        all_predictions = torch.cat(all_predictions)[:len(tokenized_dataset["test"])]
        all_labels = torch.cat(all_labels)[:len(tokenized_dataset["test"])]

        eval_metric = metric.compute(predictions=all_predictions, references=all_labels, average="weighted")
        accelerator.print(f"epoch {epoch}:", eval_metric)
The last step is to define the hyperparameters we use for our training.
hyperparameters = {
    "learning_rate": 3e-4,
    "num_epochs": 3,
    "per_tpu_train_batch_size": 32, # Actual batch size will this x 8
    "per_tpu_eval_batch_size": 8, # Actual batch size will this x 8
}
And we're ready for launch! It's super easy with the notebook_launcher from the Accelerate library.
from train import training_function
from accelerate import notebook_launcher
import os

# set environment variable to spawn xmp
# https://github.com/huggingface/accelerate/issues/967
os.environ["KAGGLE_TPU"] = "yes" # adding a fake env to launch on TPUs
os.environ["TPU_NAME"] = "dummy"
# make the TPU available accelerator to torch-xla
os.environ["XRT_TPU_CONFIG"]="localservice;0;localhost:51011"

# args
args = (model, hyperparameters, metric, tokenized_dataset)

# launch training
notebook_launcher(training_function, args)

# epoch 0: {'f1': 0.28473517320655745}
# epoch 1: {'f1': 0.814198544360063}
# epoch 2: {'f1': 0.915311713296595}
Note: You may notice that training seems exceptionally slow at first. This is because TPUs first run through a few batches of data to see how much memory to allocate before utilizing this configured memory allocation extremely efficiently.
We are using 8x v3 TPUs with a global batch size of 256, achieving 481 train_samples_per_second
The training with compilation and evaluation took 220 seconds and achieved an f1 score of 0.915.
Conclusion
In this tutorial, we learned how to train a BERT model for text classification model with the BANKING77 dataset on Google Cloud TPUs. Hugging Face accelerate allows you to easily run any PyTorch training loop on TPUs with minimal code changes.
We compared our training with the results of the “Getting started with Pytorch 2.0 and Hugging Face Transformers”, which uses the Hugging Face Trainer and Pytorch 2.0 on NVIDIA A10G GPU. The TPU accelerate version delivers a 200% reduction in training time for us to fine-tune BERT within 3,5 minutes for less than 0,5$.
Moving your training to TPUs can help increase the iteration and speed of your models and data science teams.
Thanks for reading! If you have any questions, feel free to contact me on Twitter or LinkedIn.