Fine-Tune & Evaluate LLMs in 2024 with Amazon SageMaker
Large Language Models or LLMs have seen a lot of progress in the last year. We went from no ChatGPT competitor to a whole zoo of LLMs, including Meta AI's Llama 2, Mistrals Mistral & Mixtral models, TII Falcon, and many more. Those LLMs can be used for a variety of tasks, including chatbots, question answering, summarization without any additional training. However, if you want to customize a model for your application. You may need to fine-tune the model on your data to achieve higher quality results than prompting or saving cost by training smaller models more efficient model.
This blog post walks you thorugh how to fine-tune open LLMs from Hugging Face using Amazon SageMaker. This blog is an extension and dedicated version to my How to Fine-Tune LLMs in 2024 with Hugging Face version, specifically tailored to run on Amazon SageMaker.
- Setup development environment
- Create and prepare the dataset
- Fine-tune LLM using
trlon Amazon SageMaker - Deploy & Evaluate LLM on Amazon SageMaker
Note: This blog was created to run on smaller size GPU (24GB) instances, e.g. g5.2xlarge, but can be easily adapted to run on bigger GPUs.
1. Setup Development Environment
Our first step is to install Hugging Face Libraries we need on the client to correctly prepare our dataset and start our training/evaluations jobs.
!pip install transformers "datasets[s3]==2.18.0" "sagemaker>=2.190.0" "huggingface_hub[cli]" --upgrade --quietIf you are going to use a gated model like Llama 2 or Gemma you need to login into our hugging face account, to use your token for accessing the gated repository. We can do this by running the following command:
!huggingface-cli login --token YOUR_TOKENIf you are going to use Sagemaker in a local environment. You need access to an IAM Role with the required permissions for Sagemaker. You can find here more about it.
import sagemaker
import boto3
sess = sagemaker.Session()
# sagemaker session bucket -> used for uploading data, models and logs
# sagemaker will automatically create this bucket if it not exists
sagemaker_session_bucket=None
if sagemaker_session_bucket is None and sess is not None:
    # set to default bucket if a bucket name is not given
    sagemaker_session_bucket = sess.default_bucket()

try:
    role = sagemaker.get_execution_role()
except ValueError:
    iam = boto3.client('iam')
    role = iam.get_role(RoleName='sagemaker_execution_role')['Role']['Arn']

sess = sagemaker.Session(default_bucket=sagemaker_session_bucket)

print(f"sagemaker role arn: {role}")
print(f"sagemaker bucket: {sess.default_bucket()}")
print(f"sagemaker session region: {sess.boto_region_name}")
2. Create and prepare the dataset
After our environment is set up, we can start creating and preparing our dataset. A fine-tuning dataset should have a diverse set of demonstrations of the task you want to solve. There are several ways to create such a dataset, including:
- Using existing open-source datasets, e.g., Spider
- Using LLMs to create synthetically datasets, e.g., Alpaca
- Using Humans to create datasets, e.g., Dolly.
- Using a combination of the above methods, e.g., Orca
Each of the methods has its own advantages and disadvantages and depends on the budget, time, and quality requirements. For example, using an existing dataset is the easiest but might not be tailored to your specific use case, while using humans might be the most accurate but can be time-consuming and expensive. It is also possible to combine several methods to create an instruction dataset, as shown in Orca: Progressive Learning from Complex Explanation Traces of GPT-4.
In our example we will use an already existing dataset called sql-create-context, which contains samples of natural language instructions, schema definitions and the corresponding SQL query.
We are going to use trl for fine-tuning, which supports popular instruction and conversation dataset formats. This means we only need to convert our dataset to one of the supported formats and trl will take care of the rest. Those formats include:
- conversational format
{"messages": [{"role": "system", "content": "You are..."}, {"role": "user", "content": "..."}, {"role": "assistant", "content": "..."}]}
{"messages": [{"role": "system", "content": "You are..."}, {"role": "user", "content": "..."}, {"role": "assistant", "content": "..."}]}
{"messages": [{"role": "system", "content": "You are..."}, {"role": "user", "content": "..."}, {"role": "assistant", "content": "..."}]}- instruction format
{"prompt": "<prompt text>", "completion": "<ideal generated text>"}
{"prompt": "<prompt text>", "completion": "<ideal generated text>"}
{"prompt": "<prompt text>", "completion": "<ideal generated text>"}
In our example we are going to load our open-source dataset using the 🤗 Datasets library and then convert it into the the conversational format, where we include the schema definition in the system message for our assistant. We'll then save the dataset as jsonl file, which we can then use to fine-tune our model. We are randomly downsampling the dataset to only 10,000 samples.
Note: This step can be different for your use case. For example, if you have already a dataset from, e.g. working with OpenAI, you can skip this step and go directly to the fine-tuning step.
from datasets import load_dataset

# Convert dataset to OAI messages
system_message = """You are an text to SQL query translator. Users will ask you questions in English and you will generate a SQL query based on the provided SCHEMA.
SCHEMA:
{schema}"""

def create_conversation(sample):
  return {
    "messages": [
      {"role": "system", "content": system_message.format(schema=sample["context"])},
      {"role": "user", "content": sample["question"]},
      {"role": "assistant", "content": sample["answer"]}
    ]
  }

# Load dataset from the hub
dataset = load_dataset("b-mc2/sql-create-context", split="train")
dataset = dataset.shuffle().select(range(12500))

# Convert dataset to OAI messages
dataset = dataset.map(create_conversation, remove_columns=dataset.features,batched=False)
# split dataset into 10,000 training samples and 2,500 test samples
dataset = dataset.train_test_split(test_size=2500/12500)

print(dataset["train"][345]["messages"])
After we processed the datasets we are going to use the FileSystem integration to upload our dataset to S3. We are using the sess.default_bucket(), adjust this if you want to store the dataset in a different S3 bucket. We will use the S3 path later in our training script.
# save train_dataset to s3 using our SageMaker session
training_input_path = f's3://{sess.default_bucket()}/datasets/text-to-sql'

# save datasets to s3
dataset["train"].to_json(f"{training_input_path}/train_dataset.json", orient="records")
dataset["test"].to_json(f"{training_input_path}/test_dataset.json", orient="records")

print(f"Training data uploaded to:")
print(f"{training_input_path}/train_dataset.json")
print(f"https://s3.console.aws.amazon.com/s3/buckets/{sess.default_bucket()}/?region={sess.boto_region_name}&prefix={training_input_path.split('/', 3)[-1]}/")
3. Fine-tune LLM using trl on Amazon SageMaker
We are now ready to fine-tune our model. We will use the SFTTrainer from trl to fine-tune our model. The SFTTrainer makes it straightfoward to supervise fine-tune open LLMs. The SFTTrainer is a subclass of the Trainer from the transformers library and supports all the same features, including logging, evaluation, and checkpointing, but adds additiional quality of life features, including:
- Dataset formatting, including conversational and instruction format
- Training on completions only, ignoring prompts
- Packing datasets for more efficient training
- PEFT (parameter-efficient fine-tuning) support including Q-LoRA
- Preparing the model and tokenizer for conversational fine-tuning (e.g. adding special tokens)
We will use the dataset formatting, packing and PEFT features in our example. As peft method we will use QLoRA a technique to reduce the memory footprint of large language models during finetuning, without sacrificing performance by using quantization. If you want to learn more about QLoRA and how it works, check out Making LLMs even more accessible with bitsandbytes, 4-bit quantization and QLoRA blog post. In Addition to QLoRA we will leverage the new Flash Attention 2 integrationg with Transformers to speed up the training. Flash Attention 2 is a new efficient attention mechanism that is up to 3x faster than the standard attention mechanism.
We prepared a run_sft.py, which uses trl with all of the features describe above. The script is re-usable, but still hackable if you want to make changes. Paramters are provided via CLI arguments using the HFArgumentParser, which cann parse any CLI argument from the TrainingArguments or from our ScriptArguments.
This means you can easily adjust the hyperparameters below and change the model_id from codellama/CodeLlama-7b-hf to mistralai/Mistral-7B-v0.1. Similar for other parameters. The parameters we selected should for any 7B model, but you can adjust them to your needs.
# hyperparameters, which are passed into the training job
hyperparameters = {
  ### SCRIPT PARAMETERS ###
  'dataset_path': '/opt/ml/input/data/training/train_dataset.json', # path where sagemaker will save training dataset
  'model_id': "codellama/CodeLlama-7b-hf",           # or `mistralai/Mistral-7B-v0.1`
  'max_seq_len': 3072,                               # max sequence length for model and packing of the dataset
  'use_qlora': True,                                 # use QLoRA model
  ### TRAINING PARAMETERS ###
  'num_train_epochs': 3,                             # number of training epochs
  'per_device_train_batch_size': 1,                  # batch size per device during training
  'gradient_accumulation_steps': 4,                  # number of steps before performing a backward/update pass
  'gradient_checkpointing': True,                    # use gradient checkpointing to save memory
  'optim': "adamw_torch_fused",                      # use fused adamw optimizer
  'logging_steps': 10,                               # log every 10 steps
  'save_strategy': "epoch",                          # save checkpoint every epoch
  'learning_rate': 2e-4,                             # learning rate, based on QLoRA paper
  'bf16': True,                                      # use bfloat16 precision
  'tf32': True,                                      # use tf32 precision
  'max_grad_norm': 0.3,                              # max gradient norm based on QLoRA paper
  'warmup_ratio': 0.03,                              # warmup ratio based on QLoRA paper
  'lr_scheduler_type': "constant",                   # use constant learning rate scheduler
  'report_to': "tensorboard",                        # report metrics to tensorboard
  'output_dir': '/tmp/tun',                          # Temporary output directory for model checkpoints
  'merge_adapters': True,                            # merge LoRA adapters into model for easier deployment
}
In order to create a sagemaker training job we need an HuggingFace Estimator. The Estimator handles end-to-end Amazon SageMaker training and deployment tasks. The Estimator manages the infrastructure use. Amazon SagMaker takes care of starting and managing all the required ec2 instances for us, provides the correct huggingface container, uploads the provided scripts and downloads the data from our S3 bucket into the container at /opt/ml/input/data. Then, it starts the training job by running.
Note: Make sure that you include the
requirements.txtin thesource_dirif you are using a custom training script. We recommend to just clone the whole repository.
from sagemaker.huggingface import HuggingFace

# define Training Job Name
job_name = f'codellama-7b-hf-text-to-sql-exp1'

# create the Estimator
huggingface_estimator = HuggingFace(
    entry_point          = 'run_sft.py',    # train script
    source_dir           = '.https://github.com/philschmid/llm-sagemaker-sample/blob/main/scripts/trl',      # directory which includes all the files needed for training
    instance_type        = 'ml.g5.2xlarge',   # instances type used for the training job
    instance_count       = 1,                 # the number of instances used for training
    max_run              = 2*24*60*60,        # maximum runtime in seconds (days * hours * minutes * seconds)
    base_job_name        = job_name,          # the name of the training job
    role                 = role,              # Iam role used in training job to access AWS ressources, e.g. S3
    volume_size          = 300,               # the size of the EBS volume in GB
    transformers_version = '4.36',            # the transformers version used in the training job
    pytorch_version      = '2.1',             # the pytorch_version version used in the training job
    py_version           = 'py310',           # the python version used in the training job
    hyperparameters      =  hyperparameters,  # the hyperparameters passed to the training job
    disable_output_compression = True,        # not compress output to save training time and cost
    environment          = {
                            "HUGGINGFACE_HUB_CACHE": "/tmp/.cache", # set env variable to cache models in /tmp
                            # "HF_TOKEN": "REPALCE_WITH_YOUR_TOKEN" # huggingface token to access gated models, e.g. llama 2
                            },
)
You can also use
g5.2xlargeinstead of theg5.4xlargeinstance type, but then it is not possible to usemerge_weightsparameter, since to merge the LoRA weights into the model weights, the model needs to fit into memory. But you could save the adapter weights and merge them using merge_adapter_weights.py after training.
We can now start our training job, with the .fit() method passing our S3 path to the training script.
# define a data input dictonary with our uploaded s3 uris
data = {'training': training_input_path}

# starting the train job with our uploaded datasets as input
huggingface_estimator.fit(data, wait=True)
In our example for CodeLlama 7B, the SageMaker training job took 6162 seconds, which is about 1.8 hours. The ml.g5.2xlarge instance we used costs $1.515 per hour for on-demand usage. As a result, the total cost for training our fine-tuned Code LLama model was only ~$2.8.
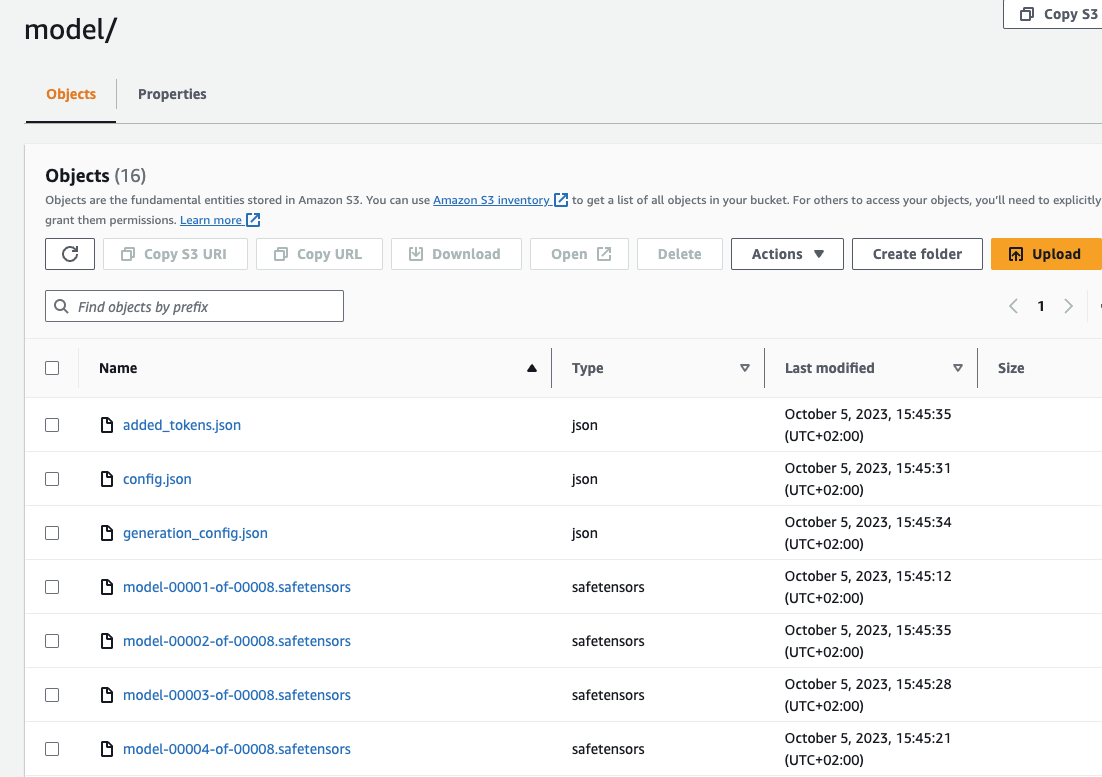
Now lets make sure SageMaker has successfully uploaded the model to S3. We can use the model_data property of the estimator to get the S3 path to the model. Since we used merge_weights=True and disable_output_compression=True the model is stored as raw files in the S3 bucket.
huggingface_estimator.model_data["S3DataSource"]["S3Uri"].replace("s3://", "https://s3.console.aws.amazon.com/s3/buckets/")You should see a similar folder structure and files in your S3 bucket:
Now, lets deploy our model to an endpoint. 🚀
4. Deploy & Evaluate LLM on Amazon SageMaker
Evaluating LLMs is crucial for understanding their capabilities and limitations, yet it poses significant challenges due to their complex and opaque nature. There are multiple ways to evaluate a fine-tuned model. You could either use an additional Training job to evaluate the model as we demonstrated in Evaluate LLMs with Hugging Face Lighteval on Amazon SageMaker or you can deploy the model to an endpoint and interactively test the model. We are going to use the latter approach in this example. We will load our eval dataset and evaluate the model on those samples, using a simple loop and accuracy as our metric.
Note: Evaluating Generative AI models is not a trivial task since 1 input can have multiple correct outputs. If you want to learn more about evaluating generative models, check out Evaluate LLMs and RAG a practical example using Langchain and Hugging Face blog post.
We are going to use the Hugging Face LLM Inference DLC a purpose-built Inference Container to easily deploy LLMs in a secure and managed environment. The DLC is powered by Text Generation Inference (TGI) solution for deploying and serving Large Language Models (LLMs).
from sagemaker.huggingface import get_huggingface_llm_image_uri

# retrieve the llm image uri
llm_image = get_huggingface_llm_image_uri(
  "huggingface",
  version="1.4.0",
  session=sess,
)

# print ecr image uri
print(f"llm image uri: {llm_image}")
We can now create a HuggingFaceModel using the container uri and the S3 path to our model. We also need to set our TGI configuration including the number of GPUs, max input tokens. You can find a full list of configuration options here.
import json
from sagemaker.huggingface import HuggingFaceModel

# s3 path where the model will be uploaded
# if you try to deploy the model to a different time add the s3 path here
model_s3_path = huggingface_estimator.model_data["S3DataSource"]["S3Uri"]

# sagemaker config
instance_type = "ml.g5.2xlarge"
number_of_gpu = 1
health_check_timeout = 300

# Define Model and Endpoint configuration parameter
config = {
  'HF_MODEL_ID': "/opt/ml/model", # path to where sagemaker stores the model
  'SM_NUM_GPUS': json.dumps(number_of_gpu), # Number of GPU used per replica
  'MAX_INPUT_LENGTH': json.dumps(1024), # Max length of input text
  'MAX_TOTAL_TOKENS': json.dumps(2048), # Max length of the generation (including input text)
}

# create HuggingFaceModel with the image uri
llm_model = HuggingFaceModel(
  role=role,
  image_uri=llm_image,
  model_data={'S3DataSource':{'S3Uri': model_s3_path,'S3DataType': 'S3Prefix','CompressionType': 'None'}},
  env=config
)
After we have created the HuggingFaceModel we can deploy it to Amazon SageMaker using the deploy method.
# Deploy model to an endpoint
# https://sagemaker.readthedocs.io/en/stable/api/inference/model.html#sagemaker.model.Model.deploy
llm = llm_model.deploy(
  initial_instance_count=1,
  instance_type=instance_type,
  container_startup_health_check_timeout=health_check_timeout, # 10 minutes to give SageMaker the time to download the model
)
After the model is deployed we can use the predict to evaluate our model on the full 2,500 samples of our test dataset.
Note: As mentioned above, evaluating generative models is not a trivial task. In our example we used the accuracy of the generated SQL based on the ground truth SQL query as our metric. An alternative way could be to automatically execute the generated SQL query and compare the results with the ground truth. This would be a more accurate metric but requires more work to setup.
But first lets test a simple request to our endpoint to see if everything is working as expected. To correctly template our prompt we need to load the tokenizer from our trained model from s3 and then template and example from our test_dataset. We can then use the predict method to send a request to our endpoint.
from transformers import AutoTokenizer
from sagemaker.s3 import S3Downloader

# Load the tokenizer
tokenizer = AutoTokenizer.from_pretrained("codellama/CodeLlama-7b-hf")

# Load the test dataset from s3
S3Downloader.download(f"{training_input_path}/test_dataset.json", ".")
test_dataset = load_dataset("json", data_files="test_dataset.json",split="train")
random_sample = test_dataset[345]

def request(sample):
    prompt = tokenizer.apply_chat_template(sample, tokenize=False, add_generation_prompt=True)
    outputs = llm.predict({
      "inputs": prompt,
      "parameters": {
        "max_new_tokens": 512,
        "do_sample": False,
        "return_full_text": False,
        "stop": ["<|im_end|>"],
      }
    })
    return {"role": "assistant", "content": outputs[0]["generated_text"].strip()}

print(random_sample["messages"][1])
request(random_sample["messages"][:2])
Awesome! Our model is working as expected. Now we can evaluate our model on 1000 samples from test dataset.
from tqdm import tqdm

def evaluate(sample):
    predicted_answer = request(sample["messages"][:2])
    if predicted_answer["content"] == sample["messages"][2]["content"]:
        return 1
    else:
        return 0

success_rate = []
number_of_eval_samples = 1000
# iterate over eval dataset and predict
for s in tqdm(test_dataset.shuffle().select(range(number_of_eval_samples))):
    success_rate.append(evaluate(s))

# compute accuracy
accuracy = sum(success_rate)/len(success_rate)

print(f"Accuracy: {accuracy*100:.2f}%")
We evaluated our model on 1000 samples from the evaluation dataset and got an accuracy of 77.40%, which took ~25 minutes. This is quite good, but as mentioned you need to take this metric with a grain of salt. It would be better if we could evaluate our model by running the qureies against a real database and compare the results. Since there might be different "correct" SQL queries for the same instruction. There are also several ways on how we could improve the performance by using few-shot learning, using RAG, Self-healing to generate the SQL query.
Don't forget to delete your endpoint once you are done.
llm.delete_model()
llm.delete_endpoint()
Thanks for reading! If you have any questions, feel free to contact me on Twitter or LinkedIn.