Build your first AI Agent with Gemini, n8n and Google Cloud Run
n8n is a powerful, open-source workflow automation tool that allows you to connect and automate different services and applications. This guide will walk you through deploying n8n on Google Cloud Run with a PostgreSQL database for persistent storage and creating a simple AI Agent using Google Gemini 2.5.
Before we start you need a Google Cloud Platform (GCP) account with a billing account configured.
Step 1: Install and Configure gcloud CLI
To interact with Google Cloud from your terminal, you need the Google Cloud CLI.
-
Install the gcloud CLI: You can install the Google Cloud CLI using the following command, or follow the official installation instructions for your specific operating system.
curl https://sdk.cloud.google.com | bash
exec -l $SHELL
gcloud init
Run
gcloud versionto verify the installation. -
Login to Google Cloud: Once installed, authenticate with your Google Cloud account:
gcloud auth loginA browser window will open asking you to log in and allow the Google Cloud SDK to access your account. Copy the authentication code and paste it into the terminal.
Step 2: Setup Google Cloud Project
We need to set up a new Google Cloud project and enable the necessary services.
-
Create a new project:
export PROJECT_ID="n8n-gemini-$(head /dev/urandom | tr -dc a-z0-9 | head -c 10)" gcloud projects create "$PROJECT_ID" --name="n8n Gemini Quickstart" gcloud config set project "$PROJECT_ID" -
Link Billing Account: You need to enable billing for your new project. Run the command below and open the URL in your browser to link your billing account.
echo "https://console.cloud.google.com/billing/linkedaccount?project=$PROJECT_ID" -
Set environment variables:
export REGION="us-central1" # Change to your preferred region, e.g. us-east1, us-west1, etc. -
Enable necessary APIs:
gcloud services enable run.googleapis.com \
    sqladmin.googleapis.com \
    secretmanager.googleapis.com \
    iam.googleapis.com
Step 3: Setup Database and Secrets
n8n requires a database to store its data. We'll use Cloud SQL for PostgreSQL and Secret Manager to securely store credentials. We are using a db-f1-micro tier for cost-effectiveness, but you can adjust the parameters like tier, storage size, and region based on your needs. For more configuration options, refer to the official documentation.
Note: This can take ~10-15 minutes.
export N8N_DB_PASSWORD=$(openssl rand -base64 16)
export N8N_ENCRYPTION_KEY=$(openssl rand -base64 42)

# Create Cloud SQL instance
gcloud sql instances create n8n-db \
    --database-version=POSTGRES_13 \
    --tier=db-f1-micro \
    --region=$REGION \
    --root-password=$N8N_DB_PASSWORD \
    --storage-size=10GB \
    --no-backup \
    --storage-type=HDD

# Create database and user
gcloud sql databases create n8n --instance=n8n-db
gcloud sql users create n8n-user \
    --instance=n8n-db \
    --password=$N8N_DB_PASSWORD

# Store secrets in Secret Manager
echo $N8N_DB_PASSWORD | gcloud secrets create n8n-db-password --data-file=- --replication-policy="automatic"
echo $N8N_ENCRYPTION_KEY | gcloud secrets create n8n-encryption-key --data-file=- --replication-policy="automatic"
Step 4: Deploy n8n to Cloud Run
Now we'll deploy n8n to Cloud Run, connecting it to our database and secrets. We need to create a service account for n8n and grant it access to the secrets, then deploy the n8n container to Cloud Run with the necessary environment variables and secrets.
-
Create a service account for n8n:
gcloud iam service-accounts create n8n-service-account \ --display-name="n8n Service Account" export SERVICE_ACCOUNT_EMAIL="n8n-service-account@$PROJECT_ID.iam.gserviceaccount.com" -
Grant necessary permissions:
gcloud secrets add-iam-policy-binding n8n-db-password \ --member="serviceAccount:$SERVICE_ACCOUNT_EMAIL" \ --role="roles/secretmanager.secretAccessor" gcloud secrets add-iam-policy-binding n8n-encryption-key \ --member="serviceAccount:$SERVICE_ACCOUNT_EMAIL" \ --role="roles/secretmanager.secretAccessor" gcloud projects add-iam-policy-binding $PROJECT_ID \ --member="serviceAccount:$SERVICE_ACCOUNT_EMAIL" \ --role="roles/cloudsql.client" -
Deploy to Cloud Run:
DB_CONNECTION_NAME="$PROJECT_ID:$REGION:n8n-db"

gcloud run deploy n8n \
    --image=n8nio/n8n:latest \
    --region=$REGION \
    --allow-unauthenticated \
    --port=5678 \
    --memory=2Gi \
    --cpu=1 \
    --no-cpu-throttling \
    --set-env-vars="N8N_PORT=5678,N8N_PROTOCOL=https,DB_TYPE=postgresdb,DB_POSTGRESDB_DATABASE=n8n,DB_POSTGRESDB_USER=n8n-user,DB_POSTGRESDB_HOST=/cloudsql/$DB_CONNECTION_NAME,DB_POSTGRESDB_PORT=5432,DB_POSTGRESDB_SCHEMA=public,GENERIC_TIMEZONE=UTC,QUEUE_HEALTH_CHECK_ACTIVE=true" \
    --set-secrets="DB_POSTGRESDB_PASSWORD=n8n-db-password:latest,N8N_ENCRYPTION_KEY=n8n-encryption-key:latest" \
    --add-cloudsql-instances=$DB_CONNECTION_NAME \
    --service-account=$SERVICE_ACCOUNT_EMAIL
Note: We use
--no-cpu-throttlingto ensure n8n's background processes (like schedules and wait nodes) continue running even when not actively handling an HTTP request.
After a successful deployment, Cloud Run will output the URL of your n8n instance. This should look like:
Done.
Service [n8n] revision [n8n-00001-qqn] has been deployed and is serving 100 percent of traffic.
Service URL: https://n8n-780597096402.us-central1.run.app
Step 5: Create your first Gemini Agent
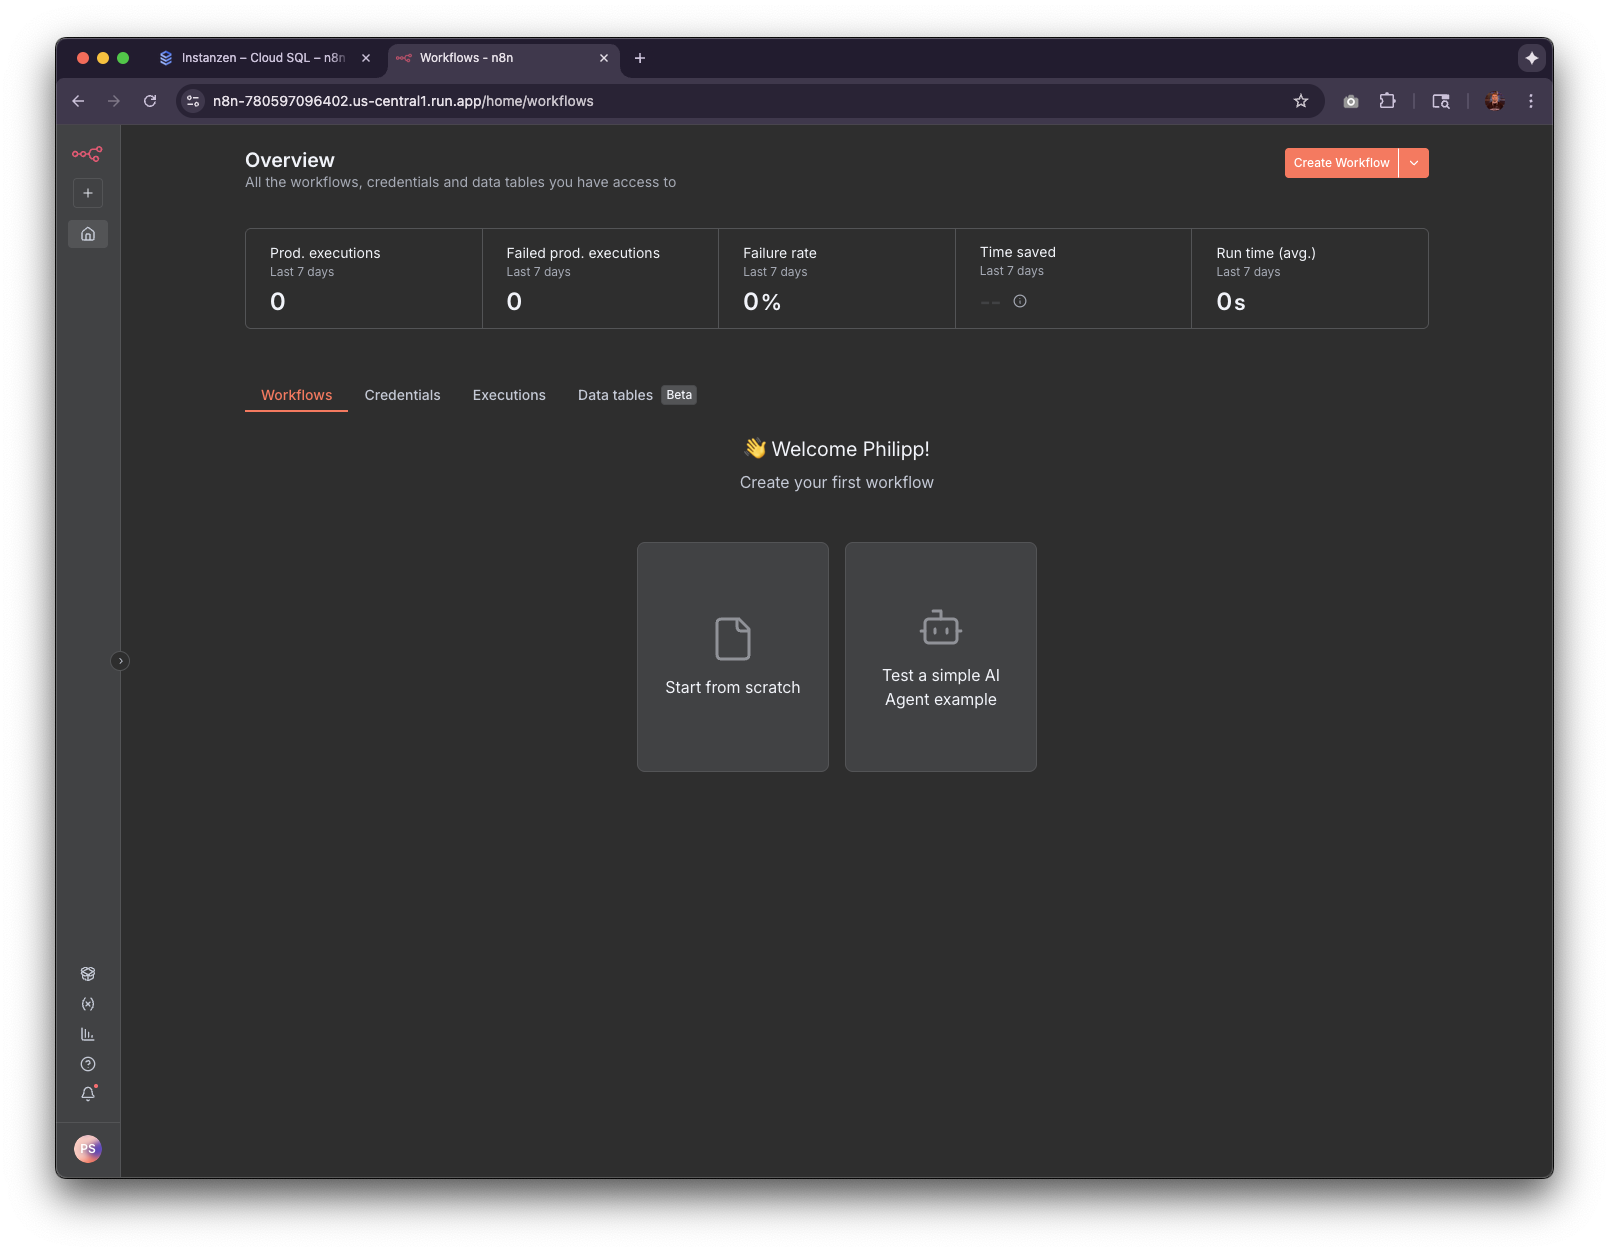
After you access your n8n instance for the first time, you will be prompted to set up an owner account. Follow the instructions to create an owner account. Here you can also add your enterprise license if you have one. Awesome, once done you should see a screen like this:
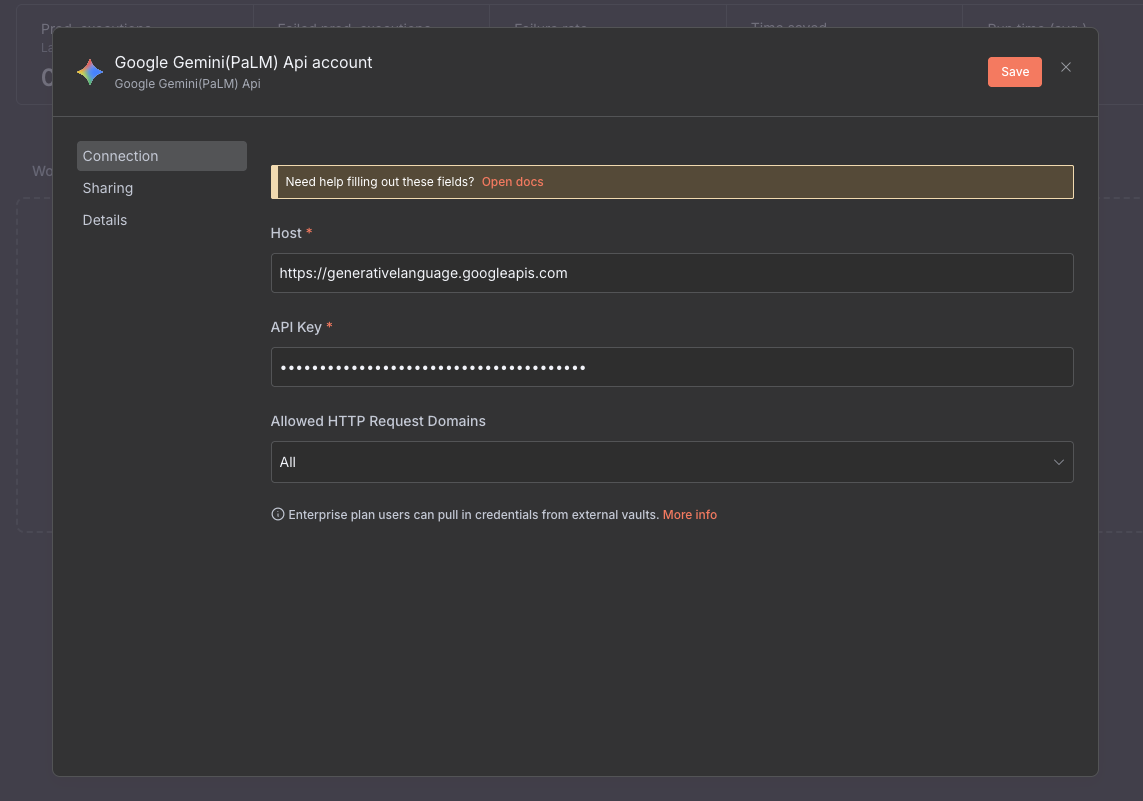
We are going to create an Agent from scratch. But before we create the Agent we need to add our Gemini API Key. Click on "Credentials" and then "Add first credential" and search for "Google Gemini (PaLM) API". Click on "Create" and follow the instructions to create a new credential. If you don't have a Gemini API Key, you can get one from the AI Studio.
Once validated go back to "Workflows" and click on "Start from scratch". You should now land in the "editor". Click "Add first step" and search for "AI Agent". Now, you should be in the in configuration of the AI Agent. At the bottom in the middle of the screen you should see "Chat Model", "Memory" and "Tool". Click on "Chat Model"
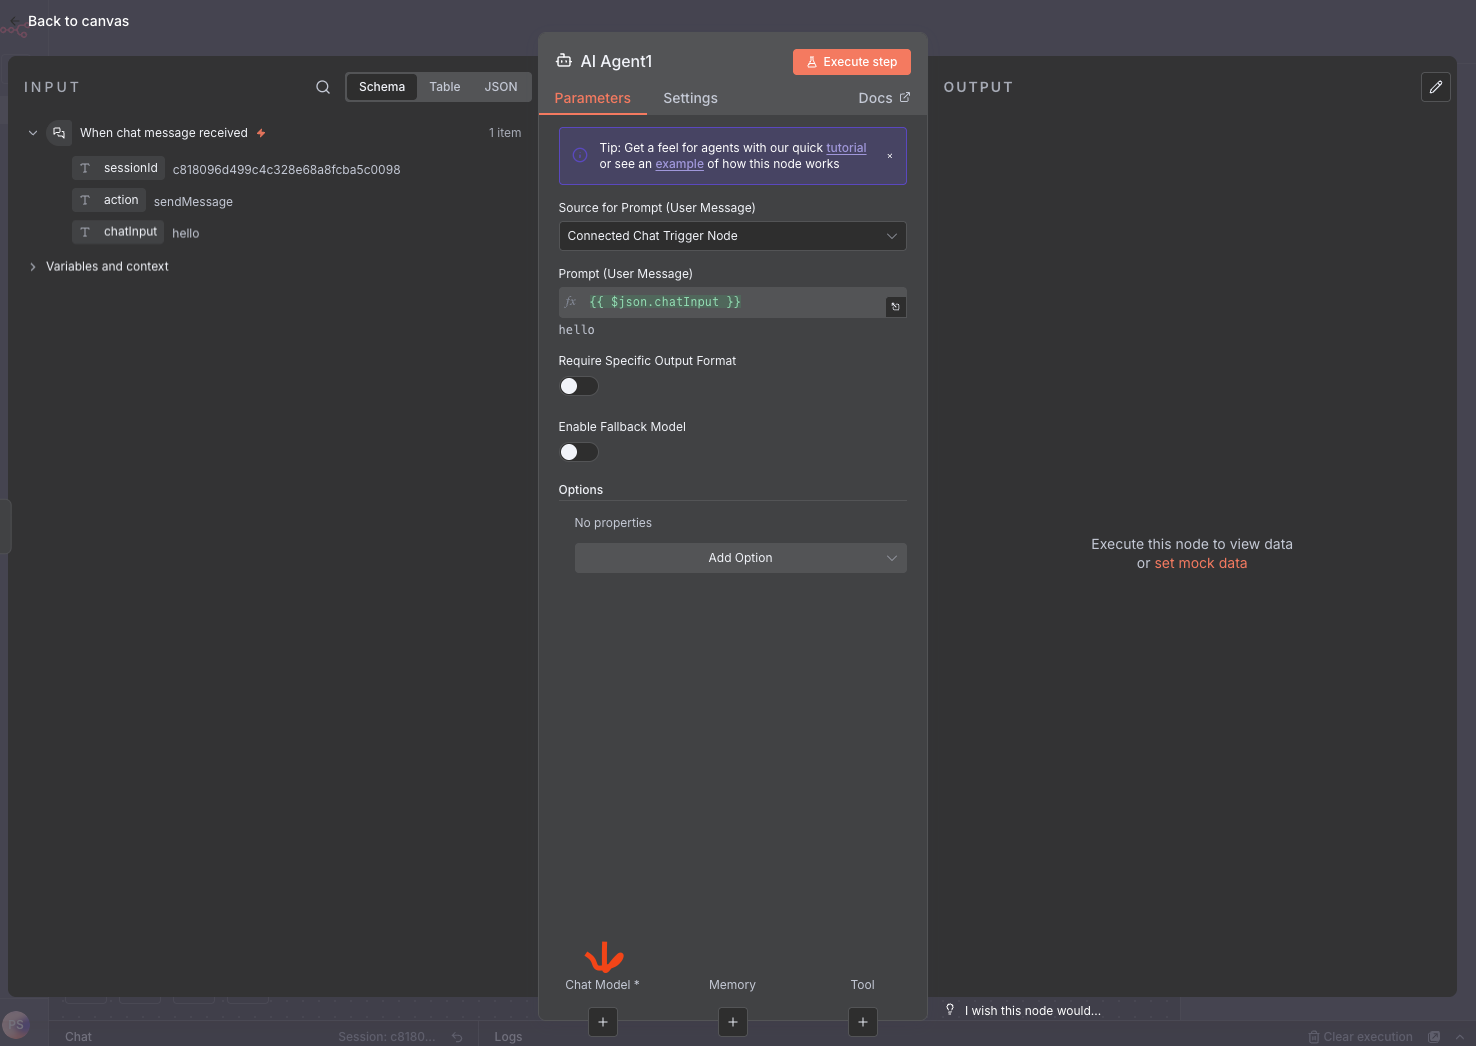
Then search for "Google Gemini Chat Model". There you should be able to select your credentials and the model you want to use. Once defined click "Back to canvas" (top left corner). You should now see a "Basic AI Agent" with Gemini.
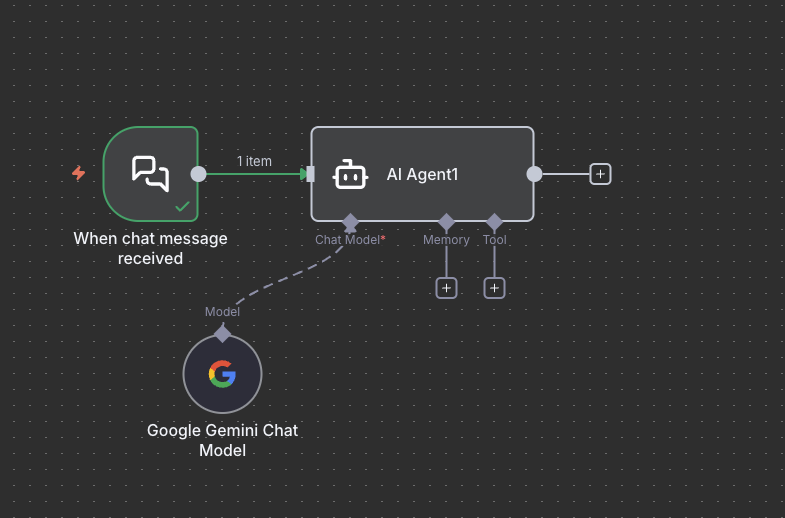
Lets try it! Click on "Open Chat" and ask it a question.
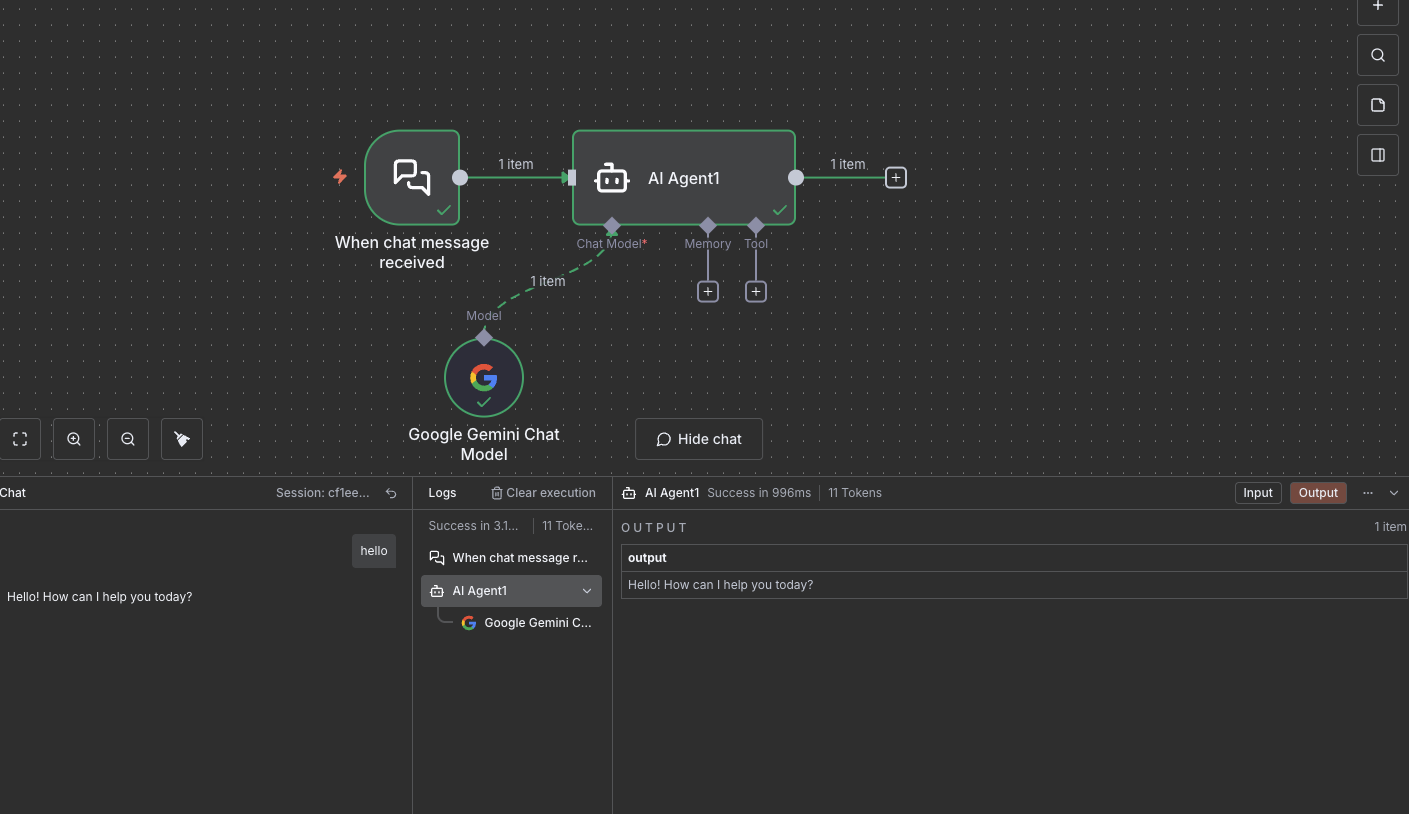
Awesome, it works! Now, lets add some tools and make it an Agent. Therefore click on "+" at "tool" under the AI Agent. Now, you should see a list of tools you can add to your Agent, including MCP servers, vector databases, or hundreds of other tools.
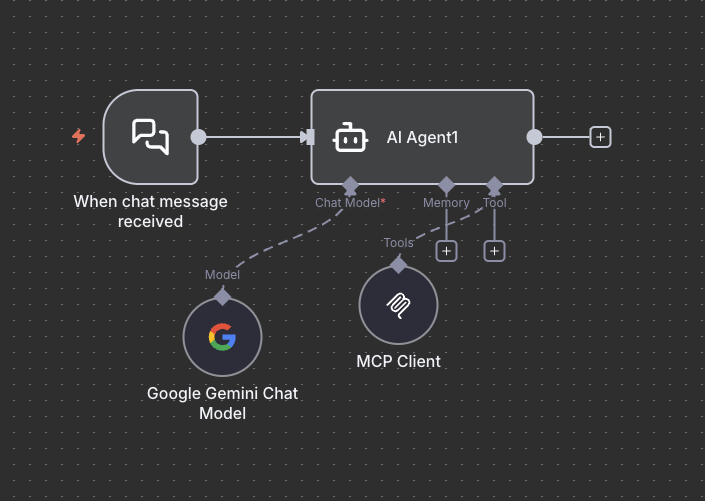
Let's try to add the "MCP (Model Context Protocol) Client". MCP is a standard that allows LLMs to connect to external data sources without custom integration code. We will use it to connect Gemini to a dummy weather service. As endpoint add https://gemini-api-demos.uc.r.appspot.com/mcp (Note: There is no guarantee that this endpoint is always available.) Once you have added your MCP server click on "back to canvas".
Your Agent should now have a tool connection to a "MCP Client".
Okay, lets test it. Click on "Open Chat" and ask it about the weather in New York, you have to include the "date" in your question, e.g. What is the weather in New York on 2025-10-29?
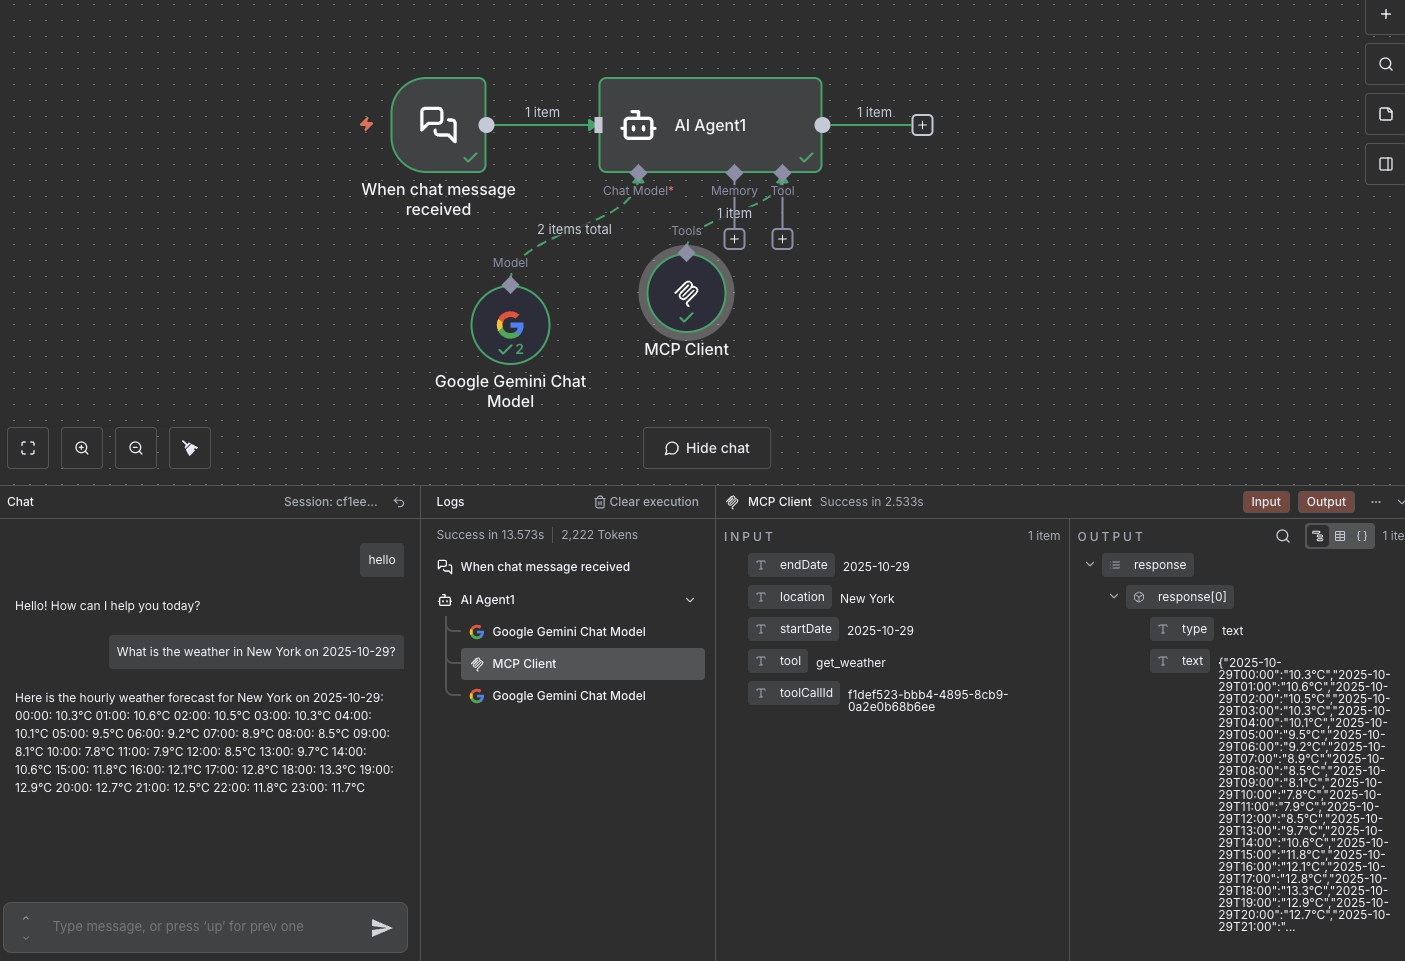
Awesome, it works! During the execution should have seen the Agent first calling Gemini, which outputs a structured call, to call the MCP Server, the MCP Server response was then sent back to Gemini, which generates the final response.
Don't forget to delete your Google Cloud resources when you are done. You can delete the resources using the following command:
gcloud run services delete n8n --region=$REGION
gcloud sql instances delete n8n-db
gcloud secrets delete n8n-db-password
gcloud secrets delete n8n-encryption-key
gcloud iam service-accounts delete $SERVICE_ACCOUNT_EMAIL
gcloud projects delete $PROJECT_ID
Next Steps
Congratz! You have successfully deployed n8n to Google Cloud Run and created your first AI Agent using Gemini 2.5. Now it's time to explore more advanced features, add more tools and build complex workflows to automate your processes. As you move from a proof-of-concept to production, consider these resources:
- Community Workflows: Over 600 community build Gemini n8n workflows
- Scaling n8n: For high-load setups, look into n8n's Queue Mode, which separates the main process from execution workers.
- Infrastructure Optimization: Optimize concurrency, startup CPU boost, database
- Advanced AI Nodes: Explore n8n's advanced AI documentation to learn about different types of memory, output parsers, and custom tools.
- Human-in-the-loop: specific nodes can be used to ask for human approval before executing sensitive actions.
- n8n Community Forum: The best place to ask questions, share your workflows, and learn from others.
- n8n YouTube Channel**: Great for visual tutorials and deep dives into complex use cases.