Document AI: Fine-tuning LayoutLM for document-understanding using Hugging Face Transformers
In this blog, you will learn how to fine-tune LayoutLM (v1) for document-understand using Hugging Face Transformers. LayoutLM is a document image understanding and information extraction transformers. LayoutLM (v1) is the only model in the LayoutLM family with an MIT-license, which allows it to be used for commercial purposes compared to other LayoutLMv2/LayoutLMv3.
We will use the FUNSD dataset a collection of 199 fully annotated forms. More information for the dataset can be found at the dataset page.
You will learn how to:
- Setup Development Environment
- Load and prepare FUNSD dataset
- Fine-tune and evaluate LayoutLM
- Run inference and parse form
Before we can start, make sure you have a Hugging Face Account to save artifacts and experiments.
Quick intro: LayoutLM by Microsoft Research
LayoutLM is a multimodal Transformer model for document image understanding and information extraction transformers and can be used form understanding and receipt understanding.
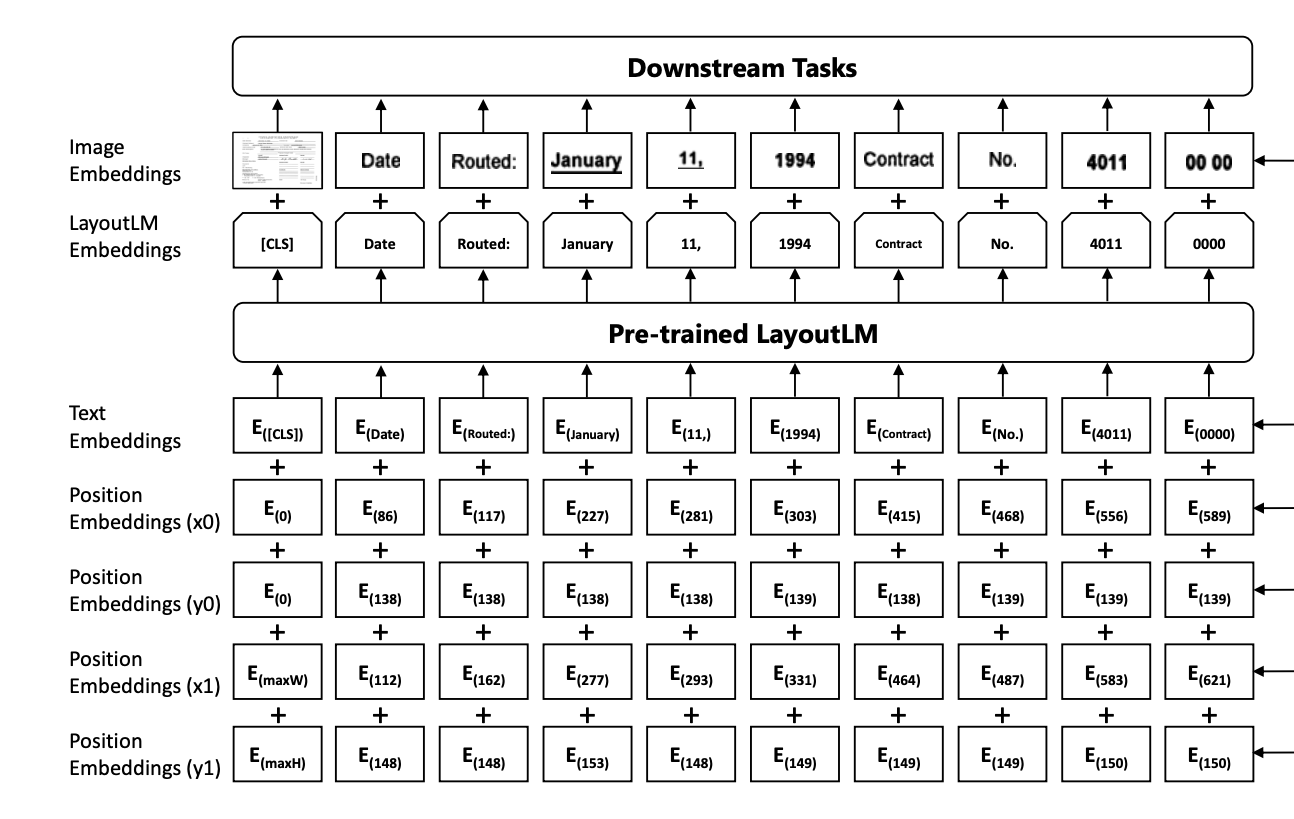
- Paper: https://arxiv.org/pdf/1912.13318.pdf
- Official repo: https://github.com/microsoft/unilm/tree/master/layoutlm
Now we know how LayoutLM works, so let's get started. 🚀
Note: This tutorial was created and run on a g4dn.xlarge AWS EC2 Instance including a NVIDIA T4.
1. Setup Development Environment
Our first step is to install the Hugging Face Libraries, including transformers and datasets. Running the following cell will install all the required packages. Additinoally, we need to install an OCR-library to extract text from images. We will use pytesseract.
# ubuntu
!sudo apt install -y tesseract-ocr
# python
!pip install pytesseract transformers datasets seqeval tensorboard
# install git-fls for pushing model and logs to the hugging face hub
!sudo apt-get install git-lfs --yes
This example will use the Hugging Face Hub as a remote model versioning service. To be able to push our model to the Hub, you need to register on the Hugging Face.
If you already have an account, you can skip this step.
After you have an account, we will use the notebook_login util from the huggingface_hub package to log into our account and store our token (access key) on the disk.
from huggingface_hub import notebook_login

notebook_login()
2. Load and prepare FUNSD dataset
We will use the FUNSD dataset a collection of 199 fully annotated forms. The dataset is available on Hugging Face at nielsr/funsd.
Note: The LayoutLM model doesn't have a AutoProcessor to nice create the our input documents, but we can use the LayoutLMv2Processor instead.
processor_id="microsoft/layoutlmv2-base-uncased"
dataset_id ="nielsr/funsd"
To load the funsd dataset, we use the load_dataset() method from the 🤗 Datasets library.
from datasets import load_dataset


dataset = load_dataset(dataset_id)

print(f"Train dataset size: {len(dataset['train'])}")
print(f"Test dataset size: {len(dataset['test'])}")
# Train dataset size: 149
# Test dataset size: 50
Lets checkout an example of the dataset.
from PIL import Image, ImageDraw, ImageFont

image = Image.open(dataset['train'][34]['image_path'])
image = image.convert("RGB")
image.resize((350,450))
We can display all our classes by inspecting the features of our dataset. Those ner_tags will be later used to create a user friendly output after we fine-tuned our model.
labels = dataset['train'].features['ner_tags'].feature.names
print(f"Available labels: {labels}")

id2label = {v: k for v, k in enumerate(labels)}
label2id = {k: v for v, k in enumerate(labels)}
#     Available labels: ['O', 'B-HEADER', 'I-HEADER', 'B-QUESTION', 'I-QUESTION', 'B-ANSWER', 'I-ANSWER']
To train our model we need to convert our inputs (text/image) to token IDs. This is done by a 🤗 Transformers Tokenizer and PyTesseract. If you are not sure what this means check out chapter 6 of the Hugging Face Course.
from transformers import LayoutLMv2Processor

# use LayoutLMv2 processor without ocr since the dataset already includes the ocr text
processor = LayoutLMv2Processor.from_pretrained(processor_id, apply_ocr=False)
Before we can process our dataset we need to define the features or the processed inputs, which are later based into the model. Features are a special dictionary that defines the internal structure of a dataset.
Compared to traditional NLP datasets we need to add the bbox feature, which is a 2D array of the bounding boxes for each token.
from PIL import Image
from functools import partial
from datasets import Features, Sequence, ClassLabel, Value, Array2D


# we need to define custom features
features = Features(
    {
        "input_ids": Sequence(feature=Value(dtype="int64")),
        "attention_mask": Sequence(Value(dtype="int64")),
        "token_type_ids": Sequence(Value(dtype="int64")),
        "bbox": Array2D(dtype="int64", shape=(512, 4)),
        "labels": Sequence(ClassLabel(names=labels)),
    }
)

# preprocess function to perpare into the correct format for the model
def process(sample, processor=None):
    encoding = processor(
        Image.open(sample["image_path"]).convert("RGB"),
        sample["words"],
        boxes=sample["bboxes"],
        word_labels=sample["ner_tags"],
        padding="max_length",
        truncation=True,
    )
    del encoding["image"]
    return encoding


# process the dataset and format it to pytorch
proc_dataset = dataset.map(
    partial(process, processor=processor),
    remove_columns=["image_path", "words", "ner_tags", "id", "bboxes"],
    features=features,
).with_format("torch")

print(proc_dataset["train"].features.keys())
# dict_keys(['input_ids', 'token_type_ids', 'attention_mask', 'bbox','lables'])
3. Fine-tune and evaluate LayoutLM
After we have processed our dataset, we can start training our model. Therefore we first need to load the microsoft/layoutlm-base-uncased model with the LayoutLMForTokenClassification class with the label mapping of our dataset.
from transformers import LayoutLMForTokenClassification

# huggingface hub model id
model_id = "microsoft/layoutlm-base-uncased"

# load model with correct number of labels and mapping
model = LayoutLMForTokenClassification.from_pretrained(
    model_id, num_labels=len(labels), label2id=label2id, id2label=id2label
)
We want to evaluate our model during training. The Trainer supports evaluation during training by providing a compute_metrics.
We are going to use seqeval and the evaluate library to evaluate the overall f1 score for all tokens.
import evaluate
import numpy as np

# load seqeval metric
metric = evaluate.load("seqeval")

# labels of the model
ner_labels = list(model.config.id2label.values())


def compute_metrics(p):
    predictions, labels = p
    predictions = np.argmax(predictions, axis=2)

    all_predictions = []
    all_labels = []
    for prediction, label in zip(predictions, labels):
        for predicted_idx, label_idx in zip(prediction, label):
            if label_idx == -100:
                continue
            all_predictions.append(ner_labels[predicted_idx])
            all_labels.append(ner_labels[label_idx])
    return metric.compute(predictions=[all_predictions], references=[all_labels])
The last step is to define the hyperparameters (TrainingArguments) we want to use for our training. We are leveraging the Hugging Face Hub integration of the Trainer to automatically push our checkpoints, logs and metrics during training into a repository.
from huggingface_hub import HfFolder
from transformers import Trainer, TrainingArguments

# hugging face parameter
repository_id = "layoutlm-funsd"

# Define training args
training_args = TrainingArguments(
    output_dir=repository_id,
    num_train_epochs=15,
    per_device_train_batch_size=16,
    per_device_eval_batch_size=8,
    fp16=True,
    learning_rate=3e-5,
    # logging & evaluation strategies
    logging_dir=f"{repository_id}/logs",
    logging_strategy="epoch",
    evaluation_strategy="epoch",
    save_strategy="epoch",
    save_total_limit=2,
    load_best_model_at_end=True,
    metric_for_best_model="overall_f1",
    # push to hub parameters
    report_to="tensorboard",
    push_to_hub=True,
    hub_strategy="every_save",
    hub_model_id=repository_id,
    hub_token=HfFolder.get_token(),
)

# Create Trainer instance
trainer = Trainer(
    model=model,
    args=training_args,
    train_dataset=proc_dataset["train"],
    eval_dataset=proc_dataset["test"],
    compute_metrics=compute_metrics,
)
We can start our training by using the train method of the Trainer.
# Start training
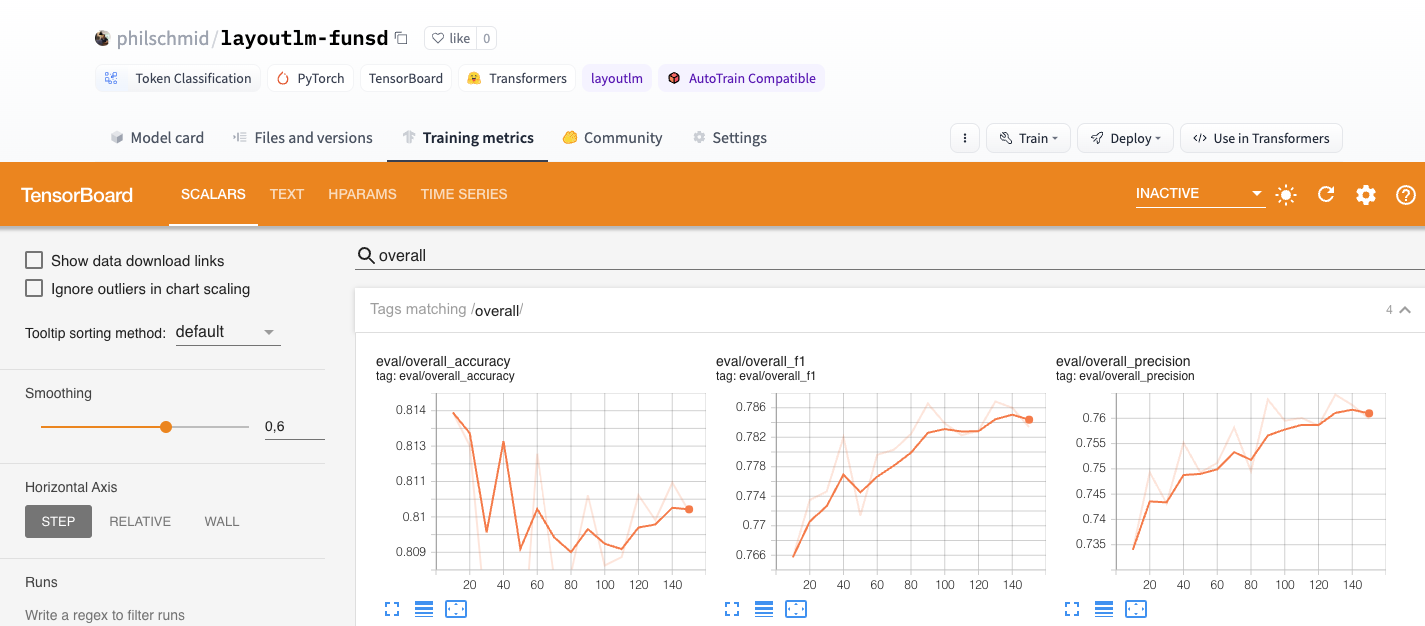
trainer.train()Nice, we have trained our model. 🎉 The best score we achieved is an overall f1 score of 0.787.
After our training is done we also want to save our processor to the Hugging Face Hub and create a model card.
# change apply_ocr to True to use the ocr text for inference
processor.feature_extractor.apply_ocr = True

# Save processor and create model card
processor.save_pretrained(repository_id)
trainer.create_model_card()
trainer.push_to_hub()
4. Run inference and parse form
Now we have a trained model, we can use it to run inference. We will create a function that takes a document image and returns the extracted text and the bounding boxes.
from transformers import LayoutLMForTokenClassification, LayoutLMv2Processor
from PIL import Image, ImageDraw, ImageFont
import torch

# load model and processor from huggingface hub
model = LayoutLMForTokenClassification.from_pretrained("philschmid/layoutlm-funsd")
processor = LayoutLMv2Processor.from_pretrained("philschmid/layoutlm-funsd")


# helper function to unnormalize bboxes for drawing onto the image
def unnormalize_box(bbox, width, height):
    return [
        width * (bbox[0] / 1000),
        height * (bbox[1] / 1000),
        width * (bbox[2] / 1000),
        height * (bbox[3] / 1000),
    ]


label2color = {
    "B-HEADER": "blue",
    "B-QUESTION": "red",
    "B-ANSWER": "green",
    "I-HEADER": "blue",
    "I-QUESTION": "red",
    "I-ANSWER": "green",
}
# draw results onto the image
def draw_boxes(image, boxes, predictions):
    width, height = image.size
    normalizes_boxes = [unnormalize_box(box, width, height) for box in boxes]

    # draw predictions over the image
    draw = ImageDraw.Draw(image)
    font = ImageFont.load_default()
    for prediction, box in zip(predictions, normalizes_boxes):
        if prediction == "O":
            continue
        draw.rectangle(box, outline="black")
        draw.rectangle(box, outline=label2color[prediction])
        draw.text((box[0] + 10, box[1] - 10), text=prediction, fill=label2color[prediction], font=font)
    return image


# run inference
def run_inference(path, model=model, processor=processor, output_image=True):
    # create model input
    image = Image.open(path).convert("RGB")
    encoding = processor(image, return_tensors="pt")
    del encoding["image"]
    # run inference
    outputs = model(**encoding)
    predictions = outputs.logits.argmax(-1).squeeze().tolist()
    # get labels
    labels = [model.config.id2label[prediction] for prediction in predictions]
    if output_image:
        return draw_boxes(image, encoding["bbox"][0], labels)
    else:
        return labels


run_inference(dataset["test"][34]["image_path"])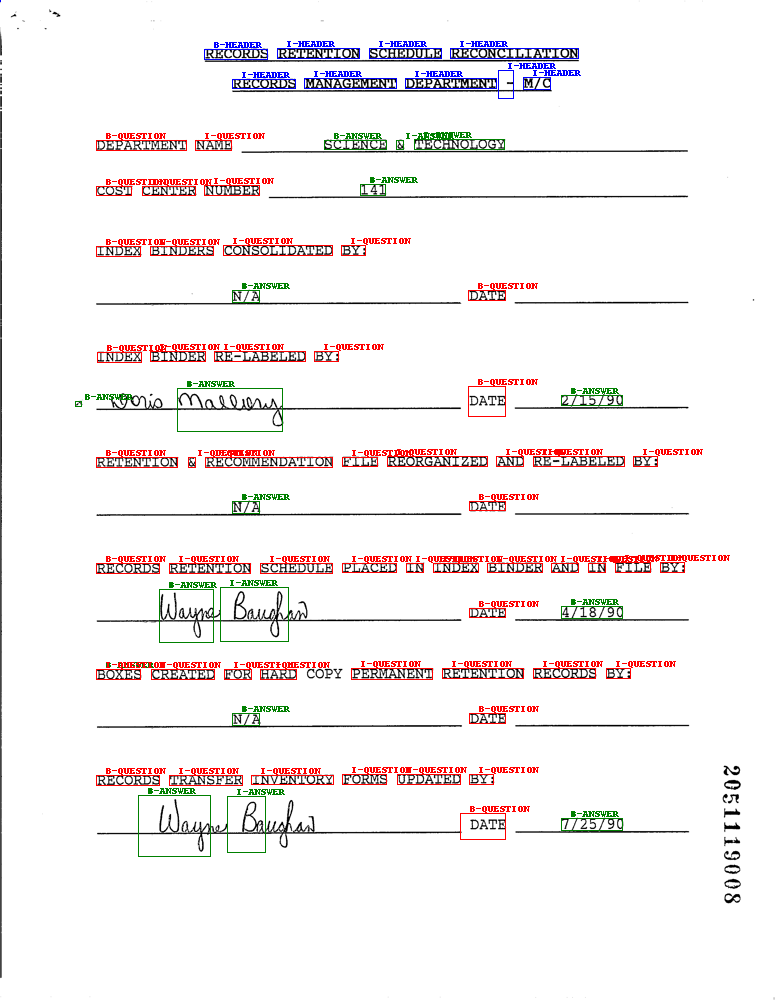
Conclusion
We managed to successfully fine-tune our LayoutLM to extract information from forms. With only 149 training examples we achieved an overall f1 score of 0.787, which is impressive and another prove for the power of transfer learning.
Now its your time to integrate LayoutLM into your own projects. 🚀
Thanks for reading! If you have any questions, feel free to contact me, through Github, or on the forum. You can also connect with me on Twitter or LinkedIn.