Automatic Speech Recogntion with Hugging Face's Transformers & Amazon SageMaker
Transformer models are changing the world of machine learning, starting with natural language processing, and now, with audio and computer vision. Hugging Face's mission is to democratize good machine learning and give anyone the opportunity to use these new state-of-the-art machine learning models.
Together with Amazon SageMaker and AWS have we been working on extending the functionalities of the Hugging Face Inference DLC and the Python SageMaker SDK to make it easier to use speech and vision models together with transformers.
You can now use the Hugging Face Inference DLC to do automatic speech recognition using MetaAIs wav2vec2 model or Microsofts WavLM or use NVIDIAs SegFormer for semantic segmentation.
This guide will walk you through how to do automatic speech recognition using wav2veec2 and new DataSerializer.
In this example you will learn how to:
- Setup a development Environment and permissions for deploying Amazon SageMaker Inference Endpoints.
- Deploy a wav2vec2 model to Amazon SageMaker for automatic speech recogntion
- Send requests to the endpoint to do speech recognition.
Let's get started! 🚀
If you are going to use Sagemaker in a local environment (not SageMaker Studio or Notebook Instances). You need access to an IAM Role with the required permissions for Sagemaker. You can find here more about it.
1. Setup a development Environment and permissions for deploying Amazon SageMaker Inference Endpoints.
Setting up the development environment and permissions needs to be done for the automatic-speech-recognition example and the semantic-segmentation example. First we update the sagemaker SDK to make sure we have new DataSerializer.
!pip install sagemaker --upgrade

import sagemaker

assert sagemaker.__version__ >= "2.86.0"
After we have update the SDK we can set the permissions.
If you are going to use Sagemaker in a local environment (not SageMaker Studio or Notebook Instances). You need access to an IAM Role with the required permissions for Sagemaker. You can find here more about it.
import sagemaker
import boto3
sess = sagemaker.Session()
# sagemaker session bucket -> used for uploading data, models and logs
# sagemaker will automatically create this bucket if it not exists
sagemaker_session_bucket=None
if sagemaker_session_bucket is None and sess is not None:
    # set to default bucket if a bucket name is not given
    sagemaker_session_bucket = sess.default_bucket()

try:
    role = sagemaker.get_execution_role()
except ValueError:
    iam = boto3.client('iam')
    role = iam.get_role(RoleName='sagemaker_execution_role')['Role']['Arn']

sess = sagemaker.Session(default_bucket=sagemaker_session_bucket)

print(f"sagemaker role arn: {role}")
print(f"sagemaker bucket: {sess.default_bucket()}")
print(f"sagemaker session region: {sess.boto_region_name}")
2. Deploy a wav2vec2 model to Amazon SageMaker for automatic speech recogntion
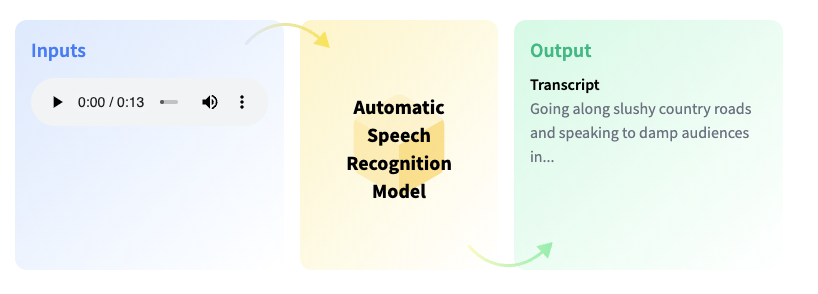
Automatic Speech Recognition (ASR), also known as Speech to Text (STT), is the task of transcribing a given audio to text. It has many applications, such as voice user interfaces.
We use the facebook/wav2vec2-base-960h model running our recognition endpoint. This model is a fine-tune checkpoint of facebook/wav2vec2-base pretrained and fine-tuned on 960 hours of Librispeech on 16kHz sampled speech audio achieving 1.8/3.3 WER on the clean/other test sets.
from sagemaker.huggingface.model import HuggingFaceModel
from sagemaker.serializers import DataSerializer

# Hub Model configuration. <https://huggingface.co/models>
hub = {
    'HF_MODEL_ID':'facebook/wav2vec2-base-960h',
    'HF_TASK':'automatic-speech-recognition',
}

# create Hugging Face Model Class
huggingface_model = HuggingFaceModel(
   env=hub,                      # configuration for loading model from Hub
   role=role,                    # iam role with permissions to create an Endpoint
   transformers_version="4.17",  # transformers version used
   pytorch_version="1.10",        # pytorch version used
   py_version='py38',            # python version used
)
Before we are able to deploy our HuggingFaceModel class we need to create a new serializer, which supports our audio data. The Serializer are used in Predictor and in the predict method to serializer our data to a specific mime-type, which send to the endpoint. The default serialzier for the HuggingFacePredcitor is a JSNON serializer, but since we are not going to send text data to the endpoint we will use the DataSerializer.
# create a serializer for the data
audio_serializer = DataSerializer(content_type='audio/x-audio') # using x-audio to support multiple audio formats

# deploy model to SageMaker Inference
predictor = huggingface_model.deploy(
	initial_instance_count=1, # number of instances
	instance_type='ml.g4dn.xlarge', # ec2 instance type
  serializer=audio_serializer, # serializer for our audio data.
)
3. Send requests to the endpoint to do speech recognition.
The .deploy() returns an HuggingFacePredictor object with our DataSerializer which can be used to request inference. This HuggingFacePredictor makes it easy to send requests to your endpoint and get the results back.
We will use 2 different methods to send requests to the endpoint:
a. Provide a audio file via path to the predictor
b. Provide binary audio data object to the predictor
a. Provide a audio file via path to the predictor
Using a audio file as input is easy as easy as providing the path to its location. The DataSerializer will then read it and send the bytes to the endpoint.
We can use a librispeech sample hosted on huggingface.co
!wget https://cdn-media.huggingface.co/speech_samples/sample1.flacTo send a request with provide our path to the audio file we can use the following code:
audio_path = "sample1.flac"

res = predictor.predict(data=audio_path)
print(res)
#    {'text': "GOING ALONG SLUSHY COUNTRY ROADS AND SPEAKING TO DAMP AUDIENCES IN DRAUGHTY SCHOOL ROOMS DAY AFTER DAY FOR A FORTNIGHT HE'LL HAVE TO PUT IN AN APPEARANCE AT SOME PLACE OF WORSHIP ON SUNDAY MORNING AND HE CAN COME TO US IMMEDIATELY AFTERWARDS"}
b. Provide binary audio data object to the predictor
Instead of providing a path to the audio file we can also directy provide the bytes of it reading the file in python.
make sure sample1.flac is in the directory
audio_path = "sample1.flac"

with open(audio_path, "rb") as data_file:
  audio_data = data_file.read()
  res = predictor.predict(data=audio_data)
  print(res)
#    {'text': "GOING ALONG SLUSHY COUNTRY ROADS AND SPEAKING TO DAMP AUDIENCES IN DRAUGHTY SCHOOL ROOMS DAY AFTER DAY FOR A FORTNIGHT HE'LL HAVE TO PUT IN AN APPEARANCE AT SOME PLACE OF WORSHIP ON SUNDAY MORNING AND HE CAN COME TO US IMMEDIATELY AFTERWARDS"}
Clean up
predictor.delete_model()
predictor.delete_endpoint()
Conclusion
We succesfully managed to deploy Wav2vec2 to Amazon SageMaker for automatic speech recognition. The new DataSerializer makes it super easy to work with different mime-types than json/txt, which we are used to from NLP.
With this support we can now build state-of-the-art speech recognition systems on Amazon SageMaker with transparent insights on which models are used and how the data is processed. We could even go further and extend the inference part with a custom inference.py to include custom post-processing for grammar correction or punctuation.